


")


How to easily increase C Drive Space in Windows

Windows users must have faced the problem of running out of storage space on their C Drive at some point. When the C Drive space becomes very low, some programs, such as Adobe Programs, may not work properly and may crash. Here is an easy way to increase C Drive Space.
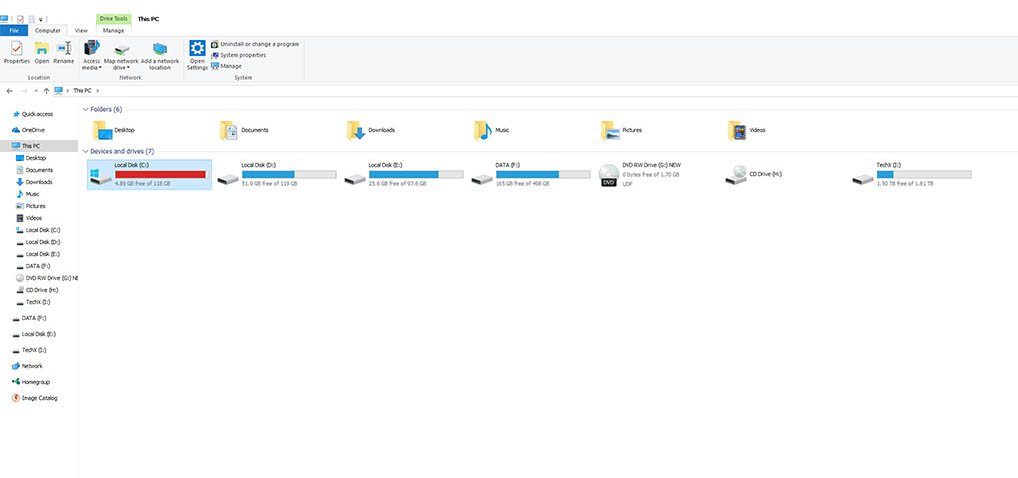
Usually, the primary drive of a PC or laptop is divided into two partitions, C and D. C is used to store Windows OS files and boot files, while D is used to store other personal files that are not necessary for the system.
When you partition your HDD or SSD and the storage space for C is low or the partition you are given is too small, the C drive space is filled with only a few programs/games. In this way, you can easily add the extra space from the D partition back to C.
Although this method can be done with Disk Management in Windows OS, as anyone who has used it knows, Disk Management is not that convenient. Sometimes, you can’t allocate as much space as you want from a partition with excess storage, and it’s not easy to merge the allocated Unallocated Space back into C. In Windows, the Unallocated Space you want to add back to C must be adjacent to C.
For these reasons, I think it’s best to use EaseUS Partition Tool, which is trusted by all PC users, to manage partitions. You can download EaseUS Partition Master from here .
With the free EaseUS Partition Master, you can easily expand and shrink disk drives to your liking, move, merge, and clone partitions while the program is open.
How to increase C Drive Space
First, check how much storage is left on the next partition drive (such as D or E) of your HDD or SSD where you partitioned C. For example, if D has about 100 GB left and you want to move 50 GB to C, you will need to free up about 50 GB from D.
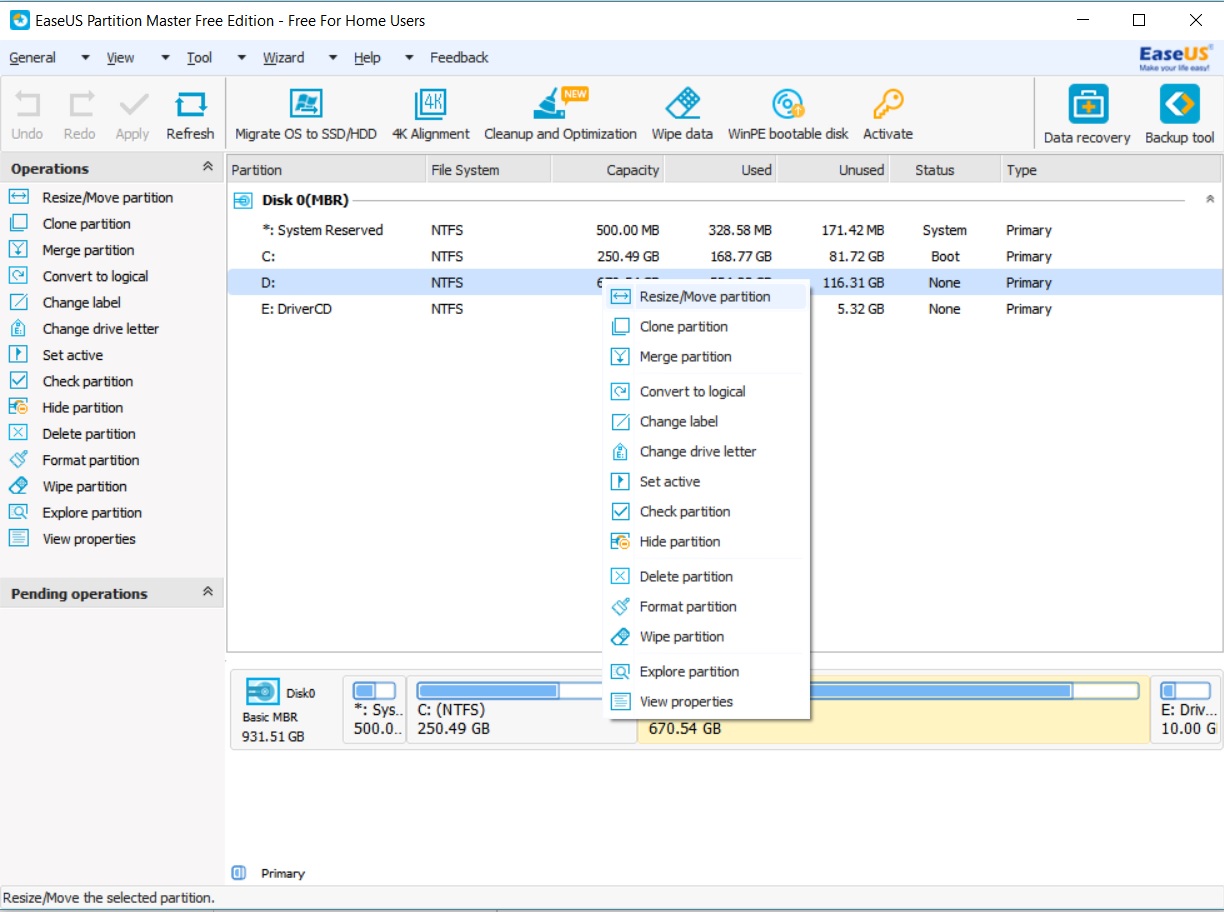
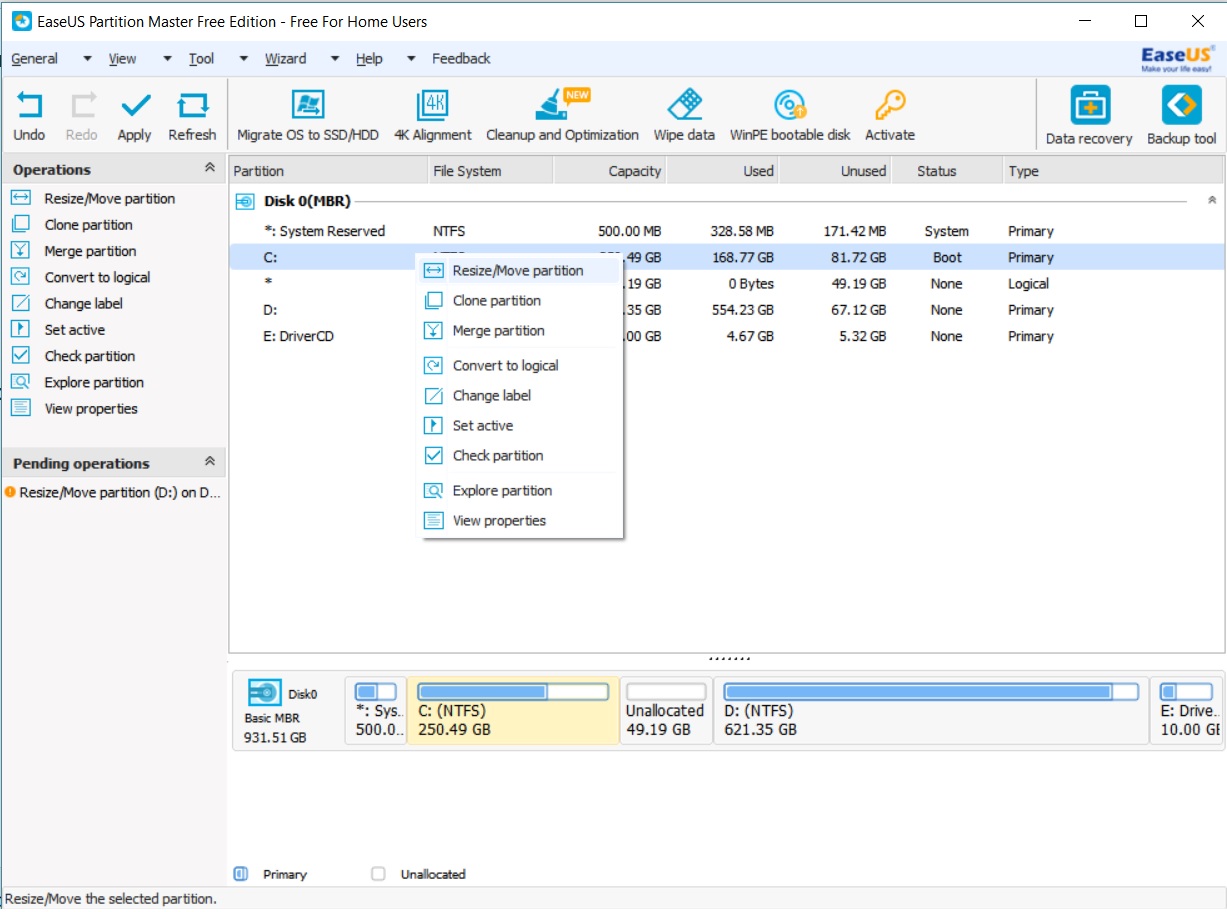
Open EaseUS Partition Master, right-click the drive you want to partition and select Resize/Move Partition. You can also do this from the side menu.
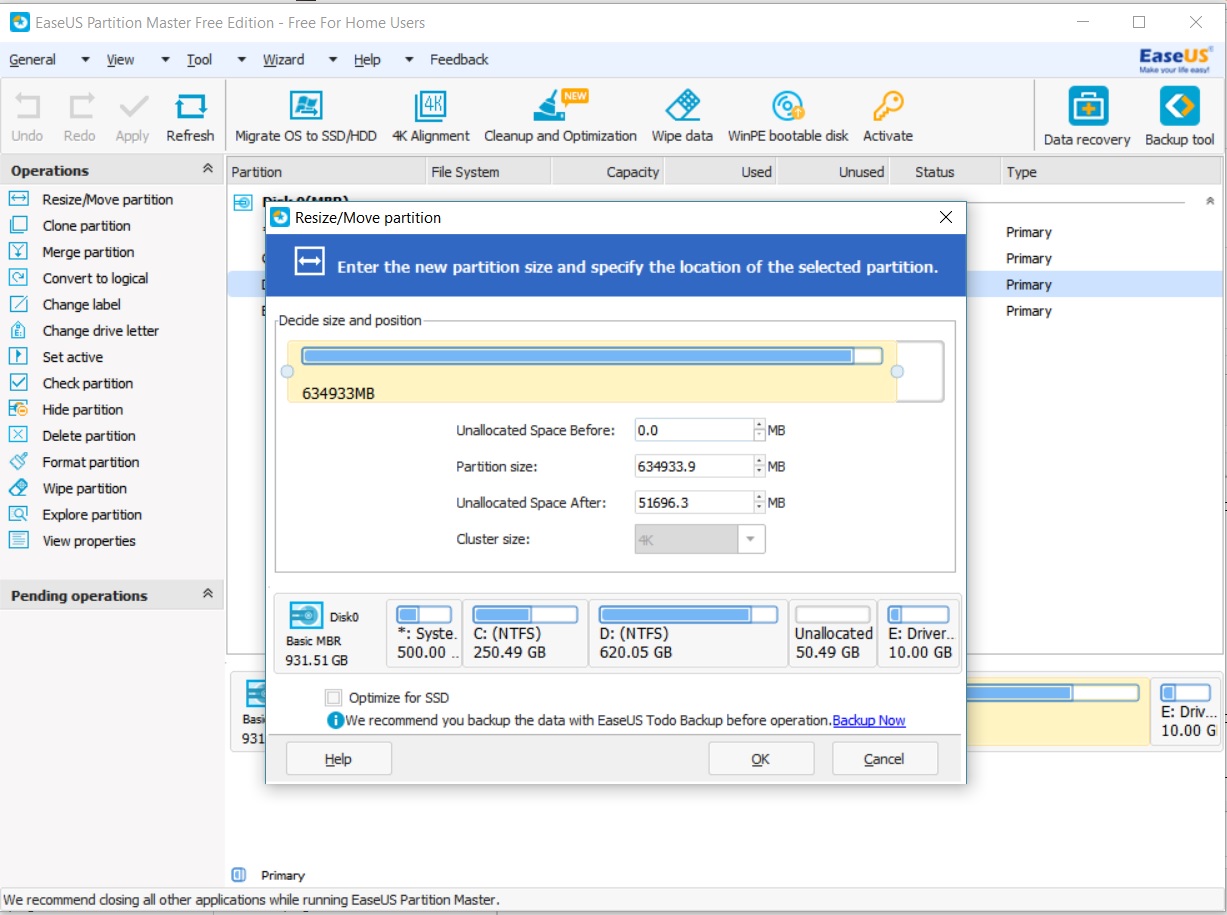
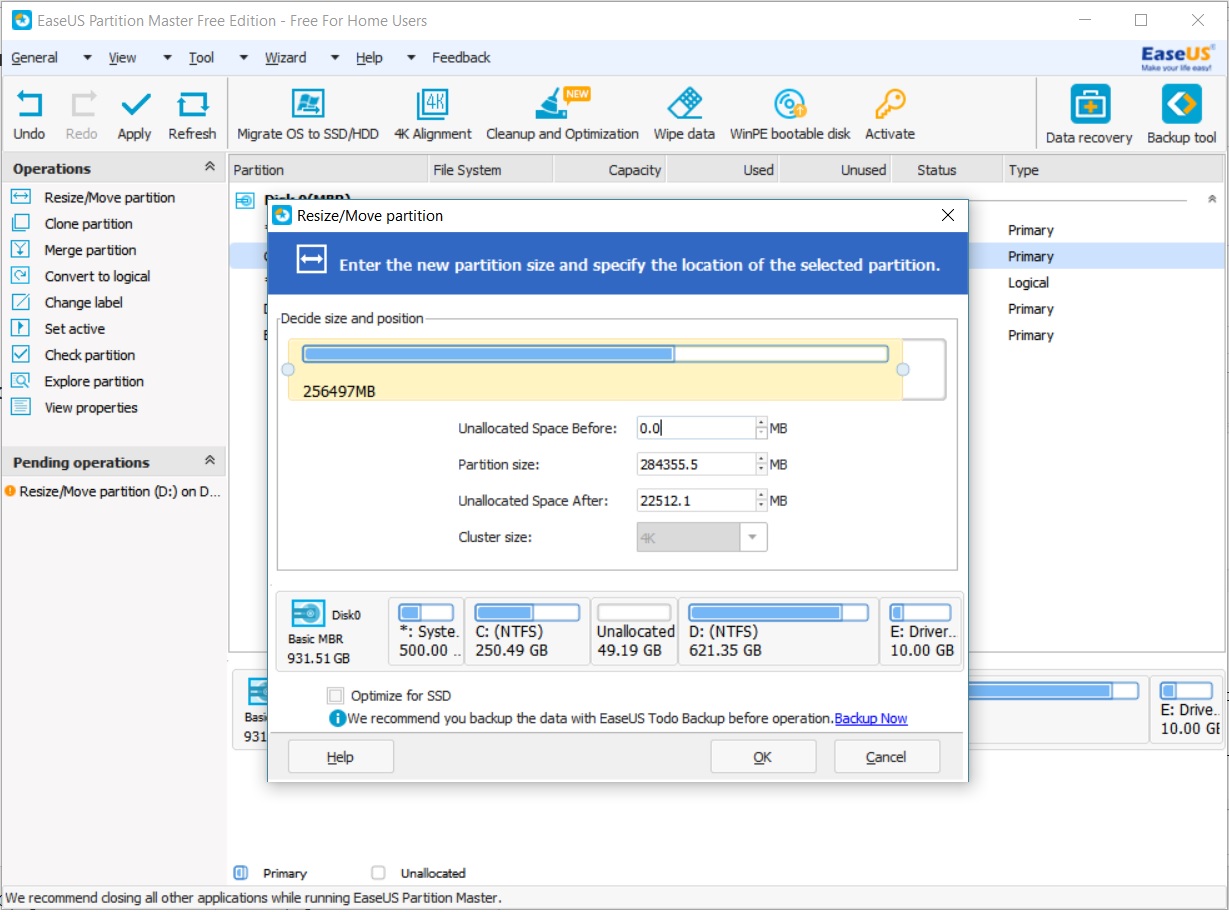
Once the Storage Space bar appears, drag it from left to right. Or, in the Unallocated Space Before section below, you can type in as many MB as you like. There are 1024 MB in 1GB.
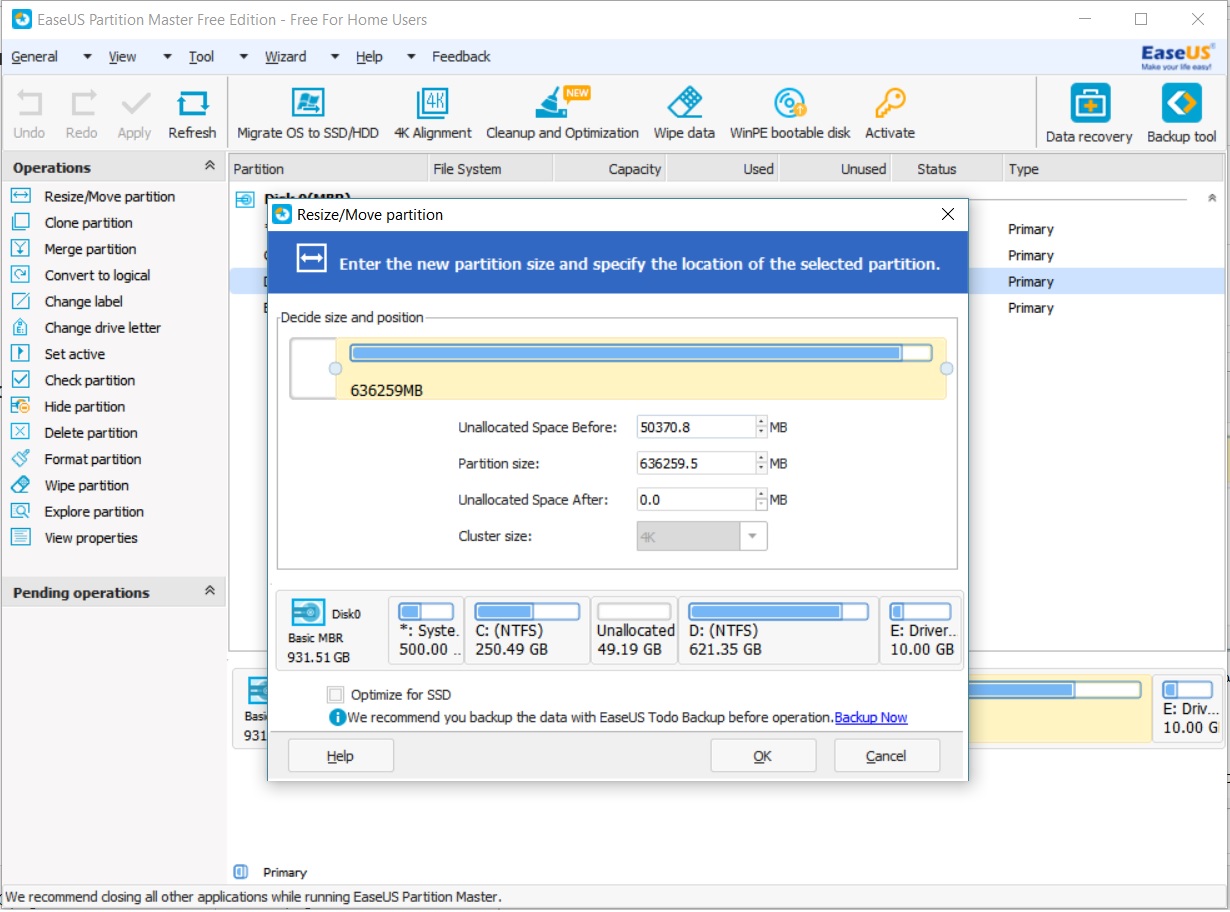
If you drag the bar from right to left, it will become Unallocated Space After, and the Unallocated Space will be adjacent to C, not in front of D, but behind D. To increase storage on C, the Unallocated Space must be adjacent to C.
Once you have set the amount of storage space you need in D, click OK.
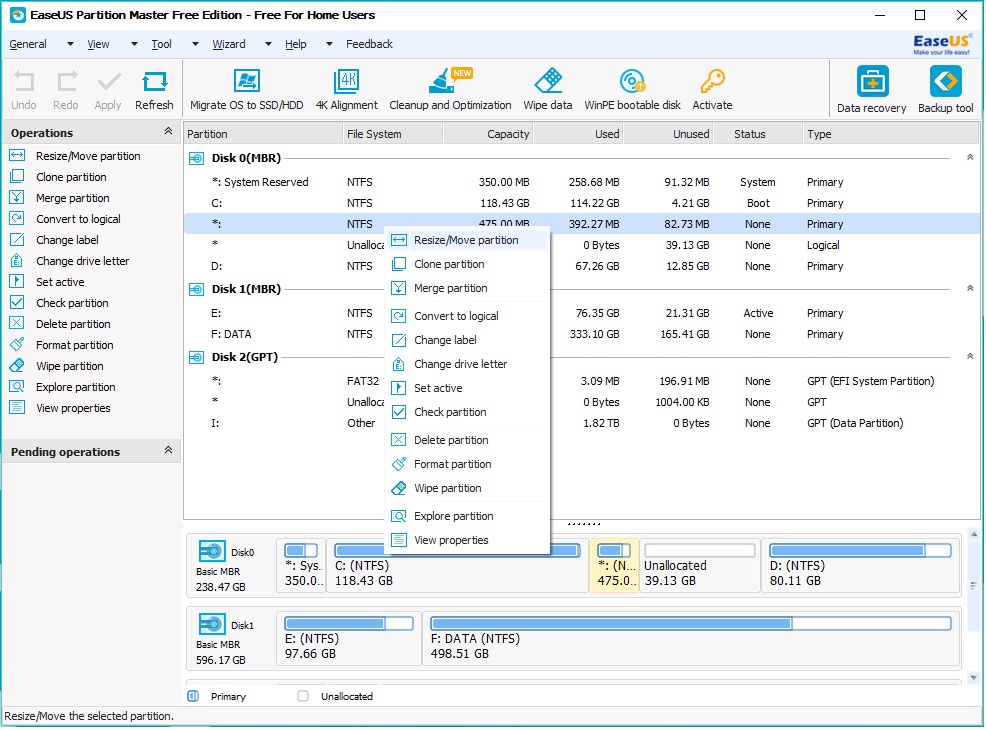
Now you should see an Unallocated Space appear next to C. Right-click on C and select Resize/Move Partition again.
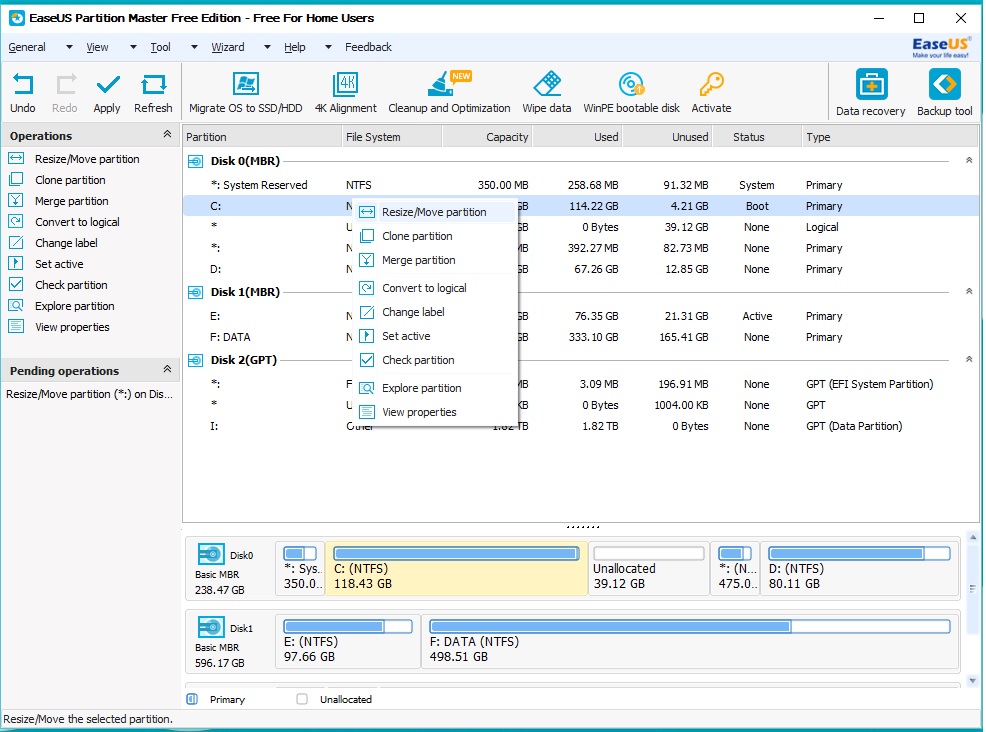
Now you will see that the storage space of C can be expanded with the bar. Expand it to the end, click OK, and then click OK.
The computer will restart, and when it boots up, you will see the EaseUS tool automatically set up the partition. For SSDs, it is better to select Optimize SSD at the bottom.
If you can’t resize because there is a drive or system partition between C and Unallocated space, you can right-click the system partition and select Move Partition, then move it behind Unallocated.
Not just C, you can resize the partition size of your HDD or SSD as needed using the method above.
EaseUS Partition Master is a more convenient and easy-to-use software than Windows’ Disk Management, and the free version works great, so you don’t even need to buy a paid version if you don’t need additional features.


Post Comment