


")


How to create your own MIUI theme on your smartphone

If you own a Xiaomi phone, you can customize your phone with a custom design and theme, including Wallpaper, Home Screen, Font, Setting Icon, Dialpad, etc. Let’s take a closer look at each step with pictures to see how.
First of all, to create your own theme, you need a Mi Account, Mi Designer Account, MIUI Theme Creator App, etc. If you are an expert in software like Photoshop, you can create your own designs and icons with more detail than the MIUI Theme Creator App.
First stage
First of all, I will tell you how to create a Mi Account. If you already have a Mi Account, you can skip these steps. You will need a Gmail account to create a Mi Account. You can register for a Mi Account by following this link .
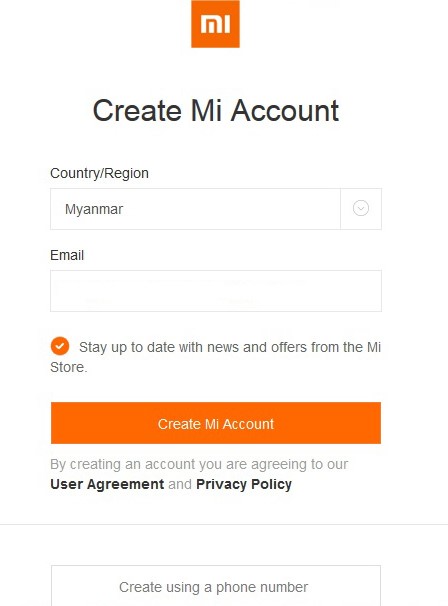
- Please fill in the Country / Region as Myanmar as shown in the image.
- In the Email field, enter the Email Account you will be using.
Then click Create Mi Account.
You will be taken to another page.

- In the Password field, enter the password you want to use.
In the next field, enter the password you typed above.
Once you have entered the Capture Code as shown in the image, your Mi Account
has been successfully created.
Second stage
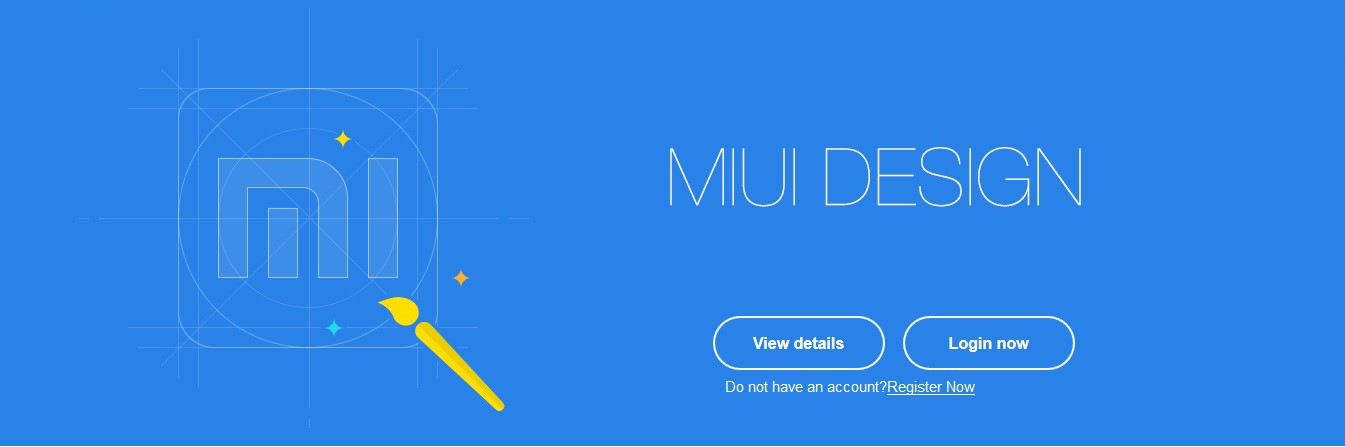
The second step is to create a Mi Designer Account. You can register for a Mi Designer Account by visiting this link .
- When it appears as shown in the image, click Login Now. You will be taken to another page.
- Then fill in the Gmail and password you created for your Mi Account.
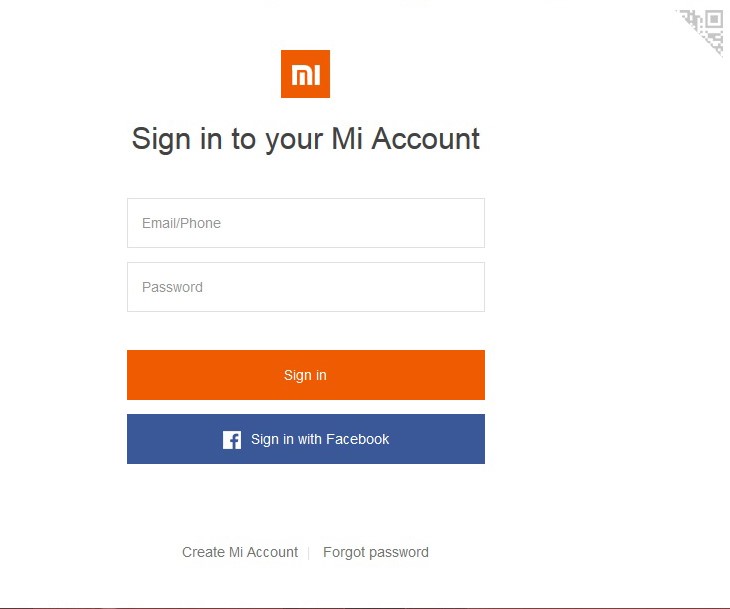
- When you click Sign In, you will see two options as shown in the image: Individual Designer and Corporate Designer. Select Individual Designer. If you select Corporate Designer, you will need to fill in Company License Registration, Tax Registration Number, etc., so you can easily register by selecting Individual Designer.
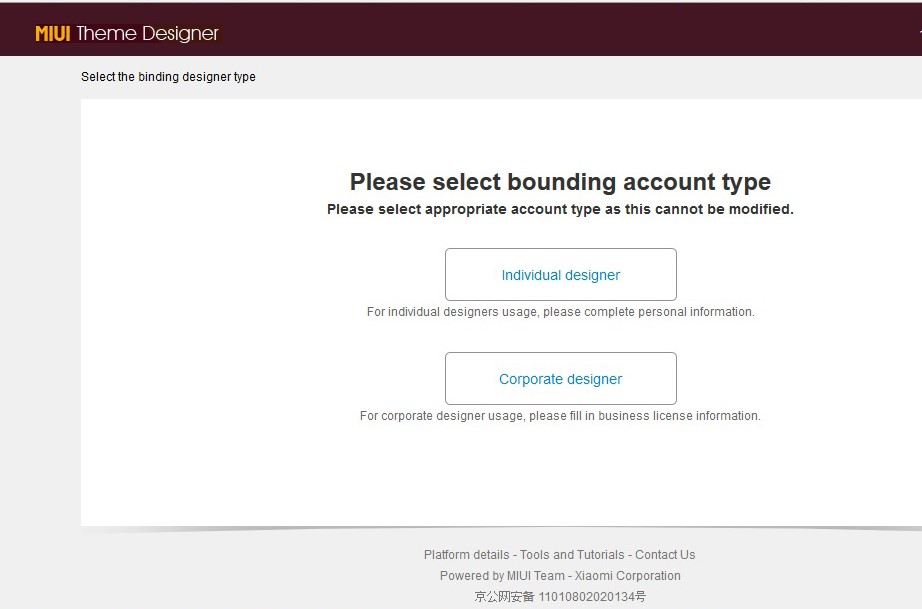
- After selecting Individual Designer, you will see the Email Address you entered at the top. Below the Email Address, you will see a link to your Mi Account called Phone – Bind. If you have linked it, it will be more secure for your account security, so you can continue to do so.
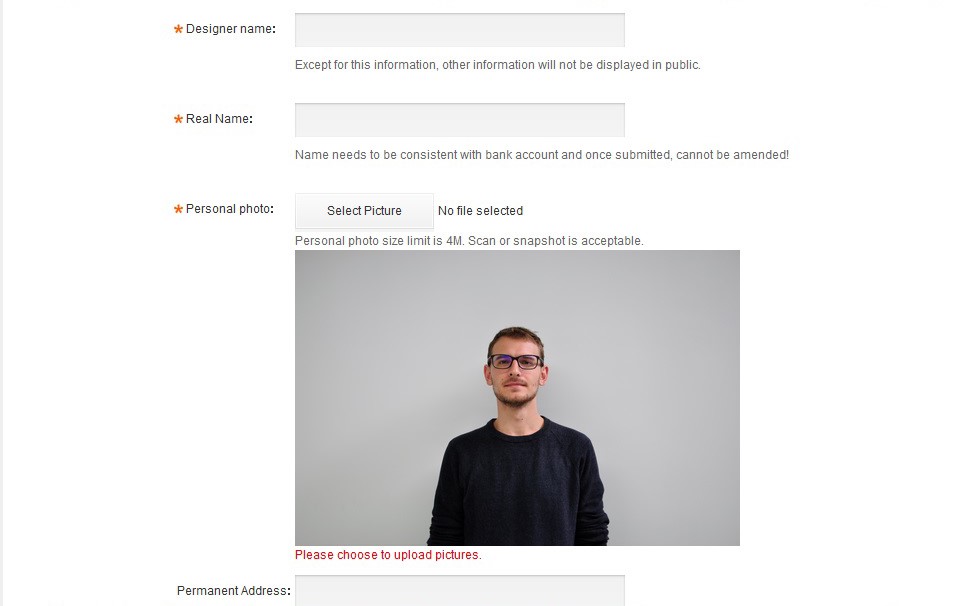
- Below, you will need to fill in your Designer Name, Real Name, Personal Photo, and Permanent Address as shown in the image. Once you have filled in all the information, click Accept Agreement and Register below.
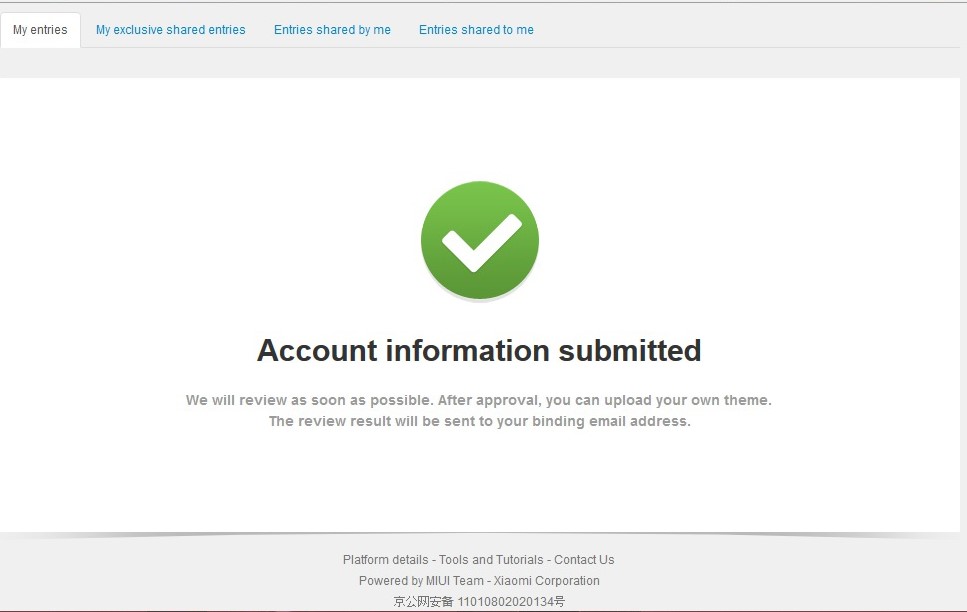
- If you reach another page and see Account information and Submitted, you have successfully submitted your Xiaomi Designer Account Request. You will need to wait 3 to 5 days for the Request Approval.
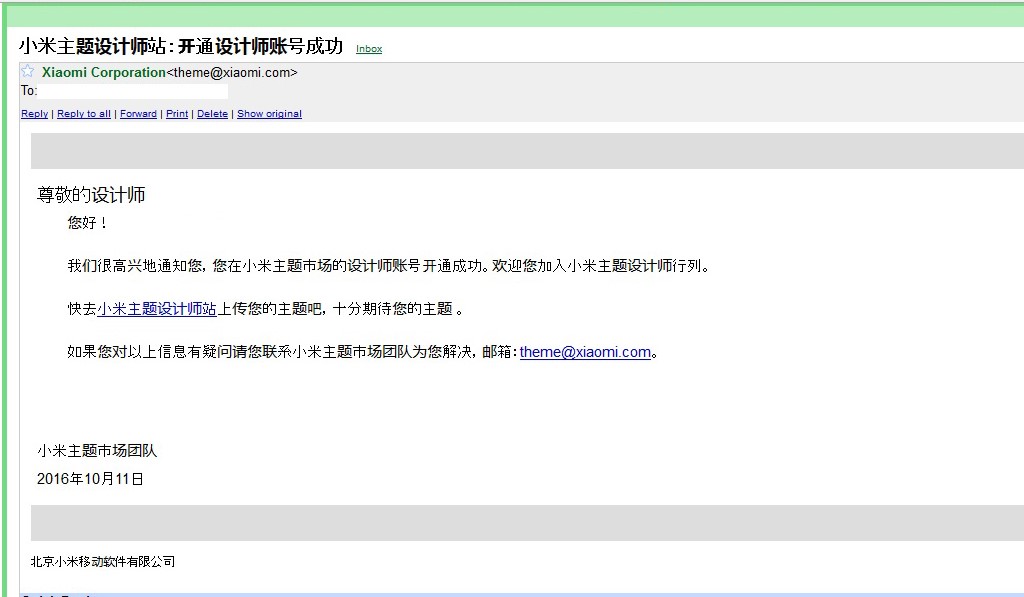
- If you receive a reply from Xiaomi Corporation to your email address as shown in the image, you have successfully obtained your Mi Designer Account.
Third stage
In the third step, you can create your own Xiaomi MIUI Theme. There are two ways to create your own theme at this stage. You can create it from a computer or from a smartphone app.
When creating with a computer, you can draw icons and designs in more detail than with a smartphone app, but it is not easy for the average user, so creating with a smart phone app is more convenient. Therefore, I will only show you how to create with a smart phone app.
First of all, you need to download the Xiaomi Theme Creator App. You can download it from this link . After downloading the application, you can start creating themes. Follow the steps shown in the image.
- First, go to the Security app, select the MIUI Theme Creator app under Other Permissions, and enable all permissions as shown in the image.

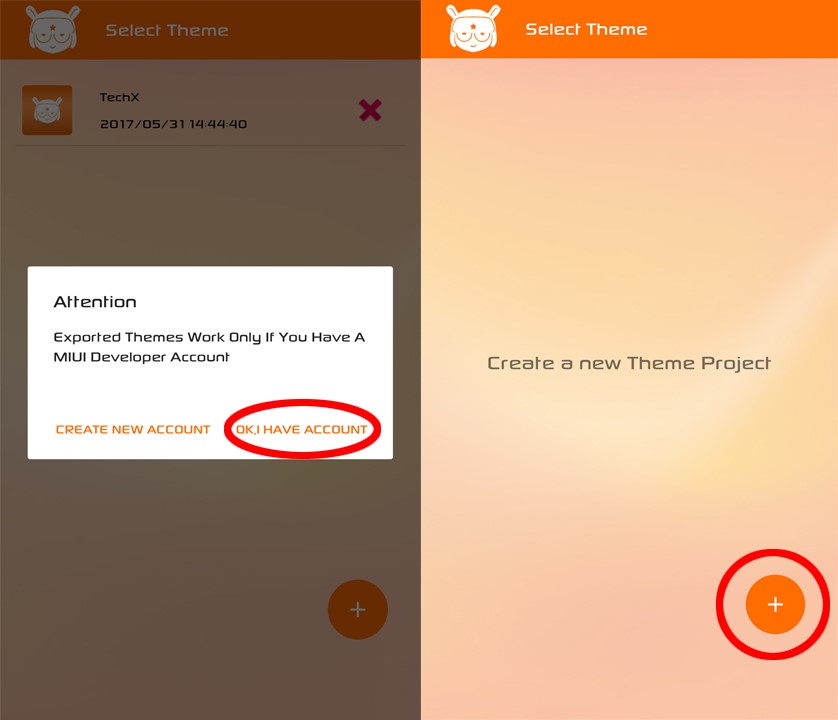
- Once you have granted permission, when you open the app, you will see two options: Create New Account and OK, I’ve an Account. Since you already have a Mi Designer account, you will need to select OK, I’ve an Account. Once you have selected and logged in, click the plus icon in the lower right corner to start creating your theme.
- You can give the Theme Name any name you like. After giving the Theme Name, you will need to click on the space you gave the name to create the Theme.

- Once we have given the Theme Name, the first thing we will do is edit the Description.
Description
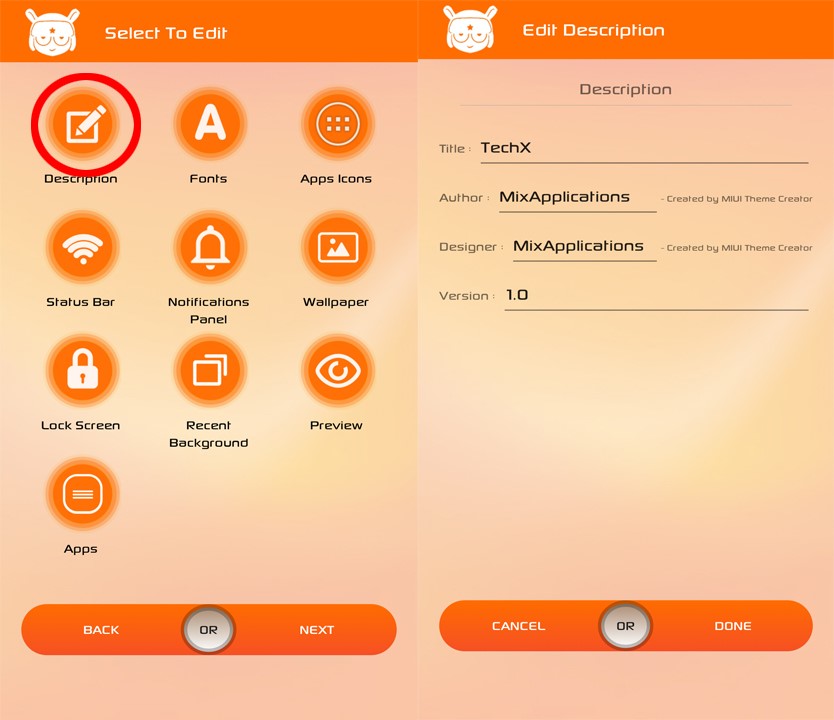
- Title – You can enter a name of your choice in the Title field. The name you enter will become the Theme Name.
- Author – In Author, you need to enter the name of the person who created the theme.
- Designer – In the Designer field, you can also enter the name of the person who designed the images for the theme. If the images were downloaded from Google, you can enter a custom name.
- Version – In Version, you can set your theme’s Version No. as you like. If you upgrade the version, if the first version was 1.0, you can use 1.1 or 2.0, etc.
Font
- Next to the Description, you will see the title Font, and you will need to add your favorite font in Font. For those who want to use Myanmar Font, you can download and install it from the link provided , or you can install any other font in .ttf format.
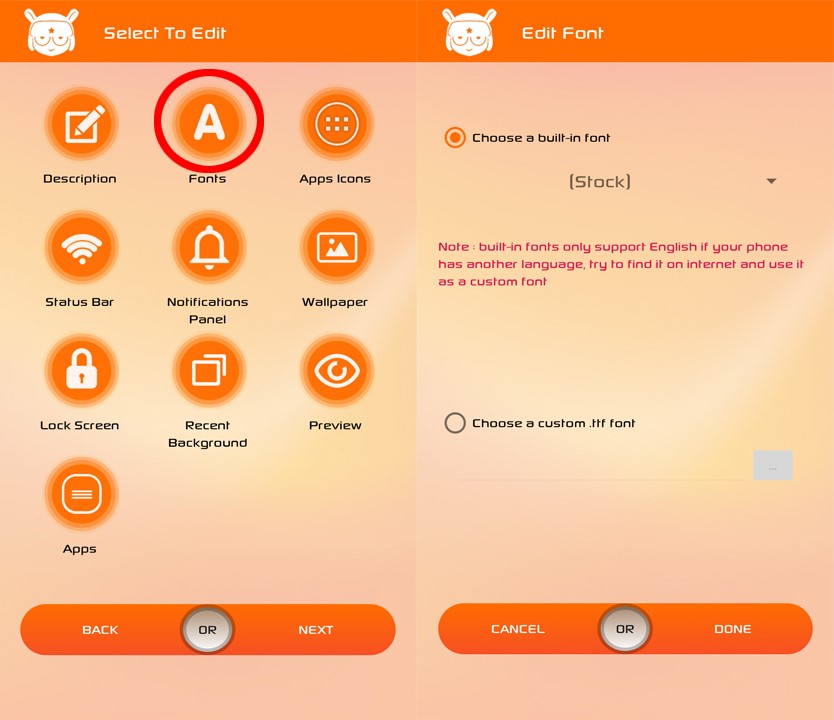
- Choose a built in font – Choose a built in font has many fonts, but they may not work with Myanmar.
- Choose a custom .ttf Font – Choose a custom .ttf font allows you to add your own custom font.
- Once you have added your custom font, click Done and exit.
App Icons
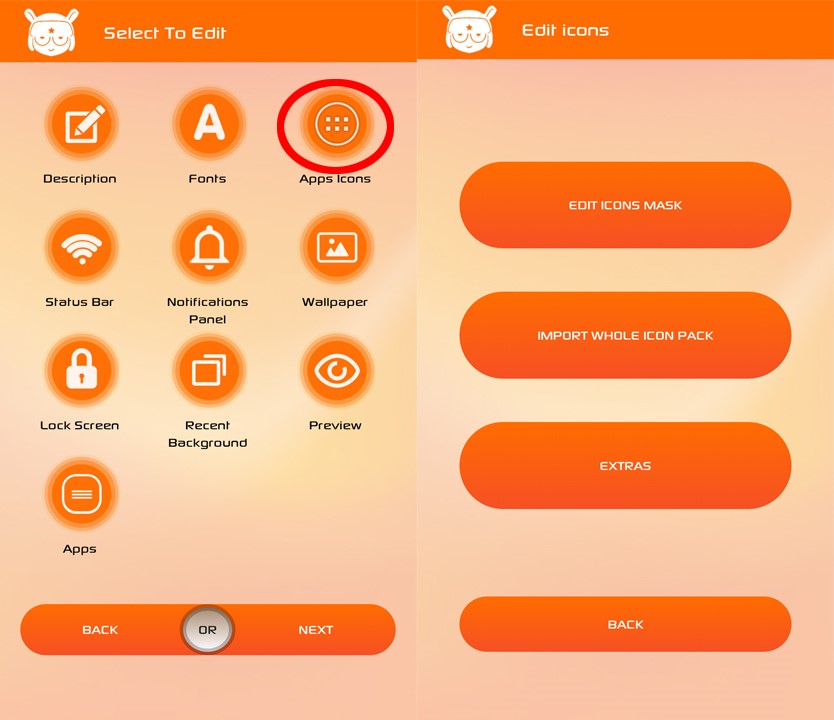
- Go to App Icons next to Font and select your favorite icon.
- As you can see in the image, you will see Edit Icon Mask, Import Whole Icon Pack, Extras, and Back. First, we will enter Edit Icon Mask.
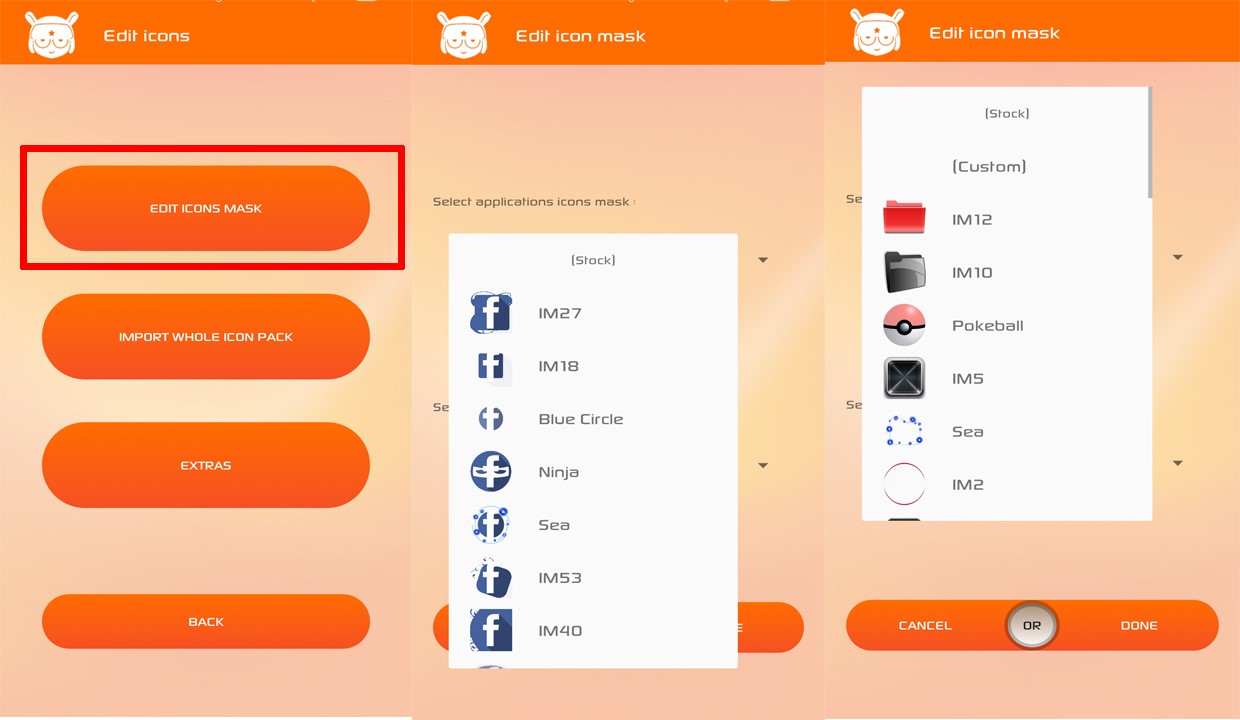
- As you can see in the image, in the Select applications icon mask, you can choose the application icons according to your preferences, and in the Select Folders icons mask below, you can choose the folders according to your preferences.
- Edit Icon Mask – The Edit Icon Mask has two sections: Selection Application icon mask and Select Folder Icon Mask.
- Selection Application icon mask – In Selection Application icon mask,
you can choose the application icon of your choice. - Select Folder icon mask – Select folder icon mask lets you choose an icon mask that will give your folders a custom look .
Since you have already selected your icons, you can’t use the Import Whole icon Pack below. However, if you want to reuse the icons from your favorite icon packs, you can select your own icon pack from Import Whole Icon Pack and import it. You can also find icon packs from the Google Play Store. Now, let’s move on to the Extras below.
- Extra – In the Extra section, you can choose the icon size as you like. The default is 64dp.
- Icon Text Color – Icon Text Color allows you to change the text below the icons to your own color. Then, as usual, click Done and exit. Then, you need to go back and return to the Home Page to make it work.
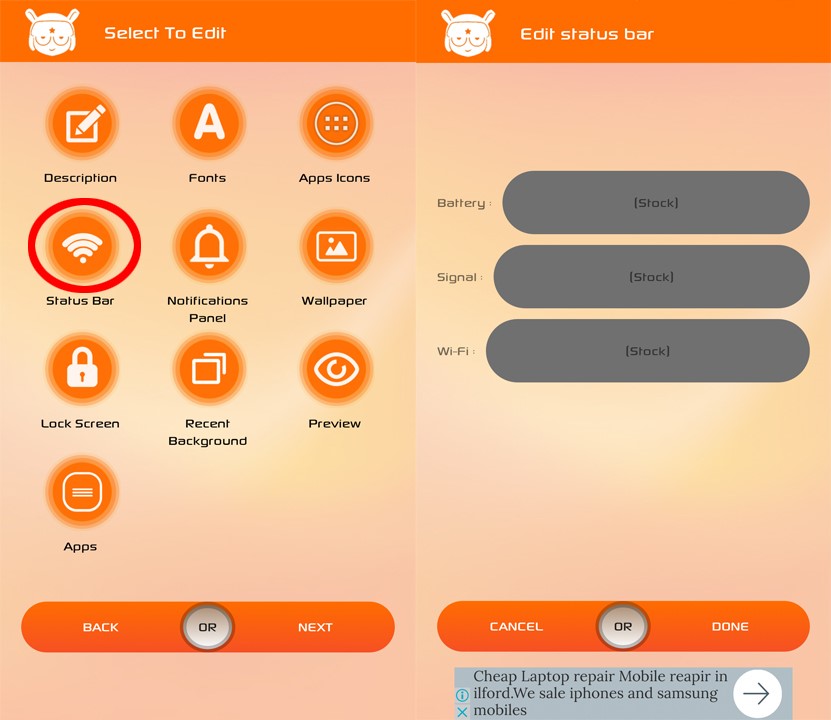
Status Bar
- On the second line, you will see the Status Bar. In the Status Bar, you will see Battery, Signal and Wifi. You can select the desired settings and exit with Done. The selected icons will be visible on the phone’s Battery Icon, Signal Icon and Wifi Icon.
Notifications Panel
- Next to the Status Bar, you will see the Notifications Panel. In the Notifications Bar, you will see the Notifications Panel Background, Shortcuts Panel Icon, and Edit Colors.
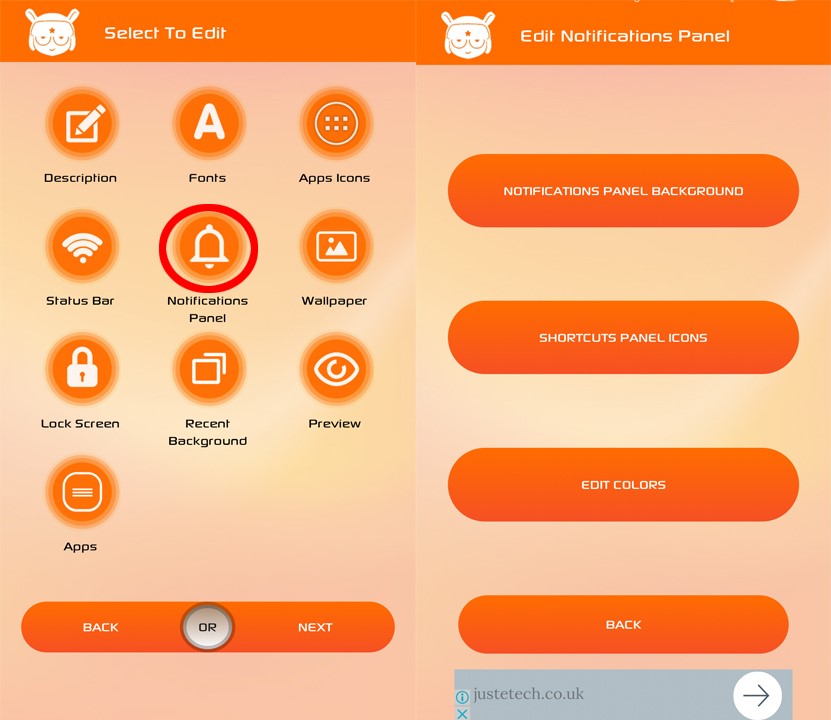
- Notification Panel Background – You can add your own image to the Notification Panel Background. The image you add is what you see when you drag down the Notification Panel.
- Shortcuts Panel icons – In the Shortcuts Panel Icons, at the top you will see Edit On Color and Edit Off Color. Below that you can choose icons from Notification Settings such as AC, Battery Saver, Bluetooth, etc. Be careful that the color selected for the Notification Panel Background selected above and the color selected for Notifications On and Off should be different.
- Edit Colors – In Edit Colors, you can choose the colors you want for Status bar_content Title, Statusbar _ Content, Statusbar_content_info, etc. as shown in the image. Once again, I would like to remind you. When choosing colors, only when the colors are different, the icons and text in the Notification Status Bar can be clearly seen.
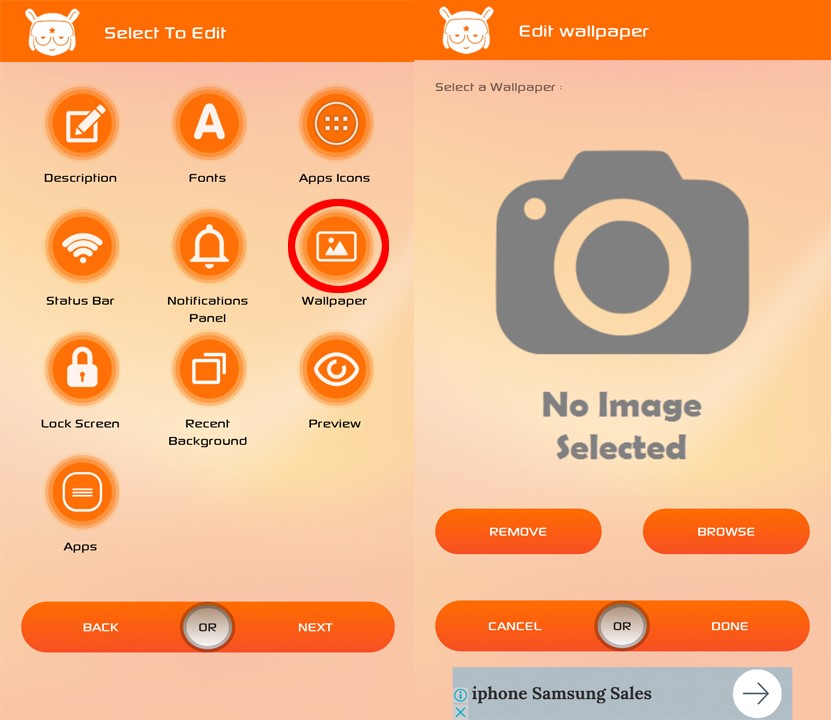
Wallpaper
- You will see Wallpaper next to the Notifications Panel. Once you enter Wallpaper, you can select and add your favorite wallpaper from Browse as shown in the image.
Lock Screen
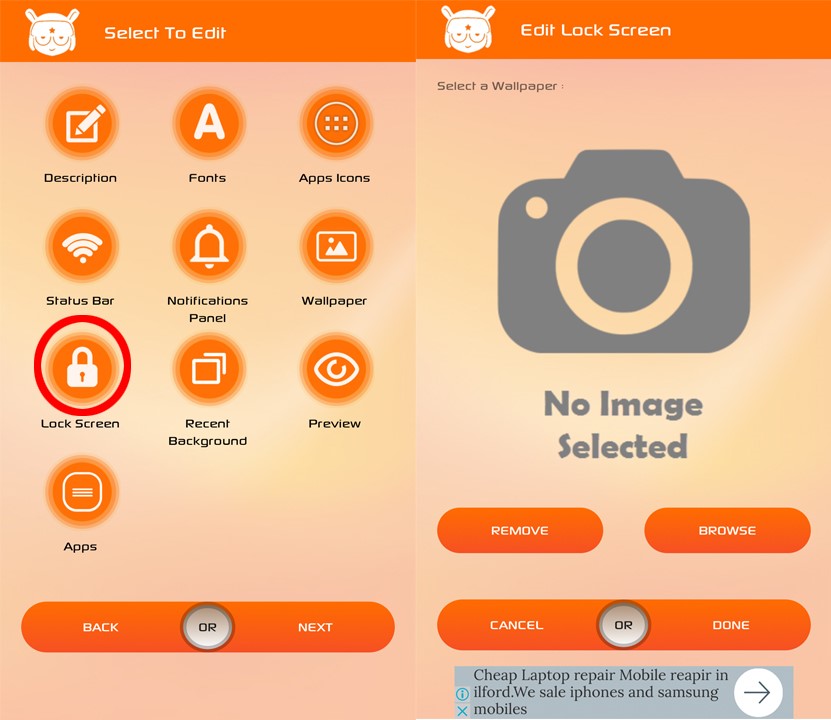
- On the third line, you will see the Lock Screen. You can also choose your favorite image on the Lock Screen, and the image you choose will be displayed on the Lock Screen.
Recent Background
- Next to the Lock Screen, you will see Recent Background. In Recent Background, you can add your own image, just like Wallpaper and Lock Screen. The image you added will be displayed as the background image when you delete Recent Apps.

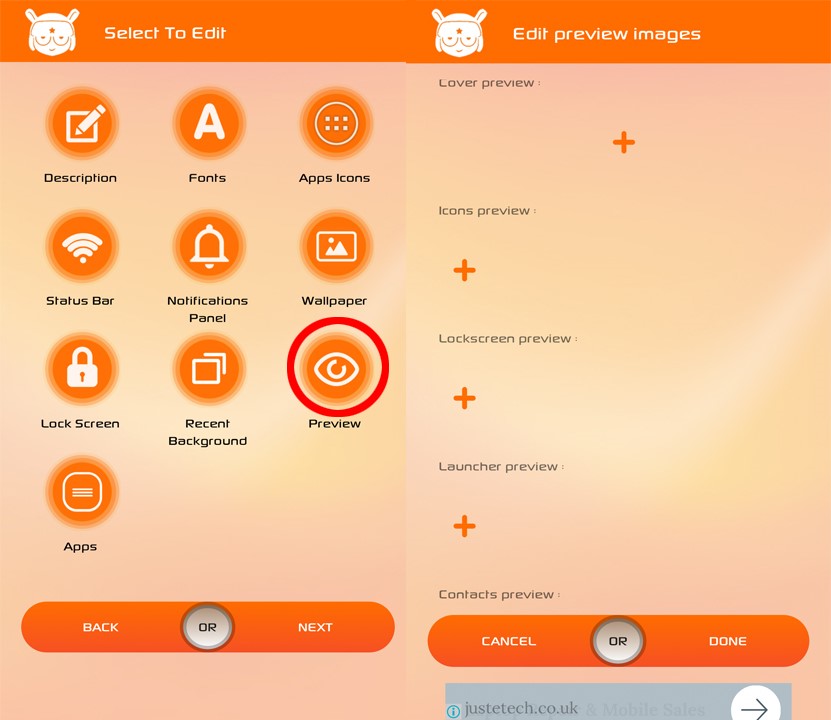
Preview
- Next to Recent Background, there is an icon called Preview. In Preview, you will see Cover Preview, Icons preview, Lock Screen Preview, etc. Just re-add the images you have added.
Apps
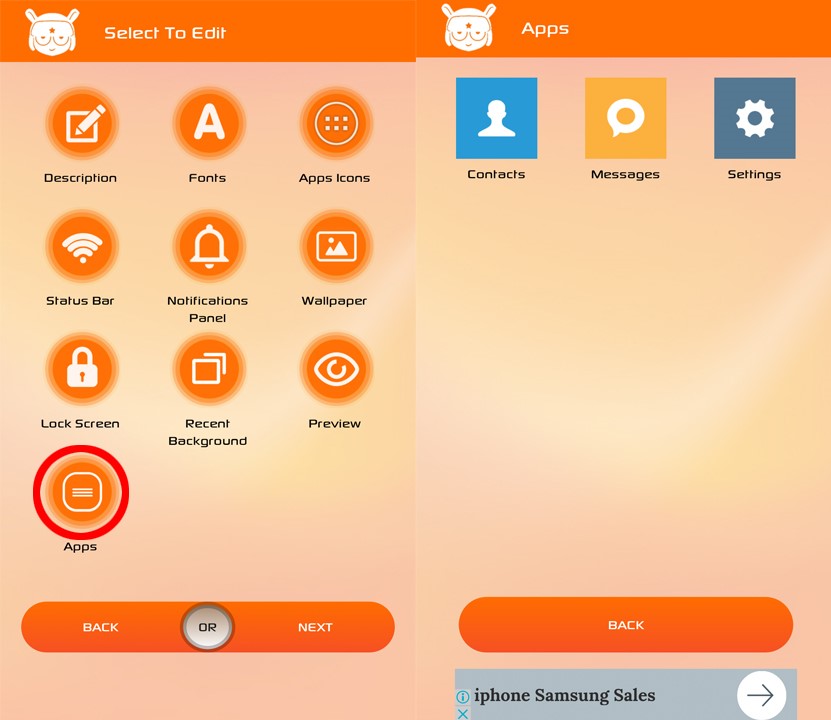
- At the bottom, you will see Apps, and in the App, there are 3 icons: Contacts, Messages, and Setting. In the first Contact, you will see Edit Call Button, Edit Dialpad Background, Edit Dialpad Button, Edit Background, Edit Colors, and Extra.

- Edit Call Button – In Edit Call Button, you can change the call button to your liking.
- Edit Dialpad Background – Edit Dialpad Background lets you choose the image behind the dial buttons.
- Edit Dialpad Button – Edit Dialpad Button You can customize the dialpad buttons and colors.
- Edit Background – In the Edit Background area, you can choose the image that will appear when you enter the phone to make a call.
Edit Color – In the Edit Color area, you can choose the background color of the call buttons, the color of the buttons, and the color of the missed call notification. - Extra – In Extra, you can customize the Contact Button, Call Button, etc. that will appear when you enter a phone call.
Once you have chosen the theme in Contacts, you can click Back to exit.
- In the Theme section of the message, you will see Edit Background and Edit Colors.
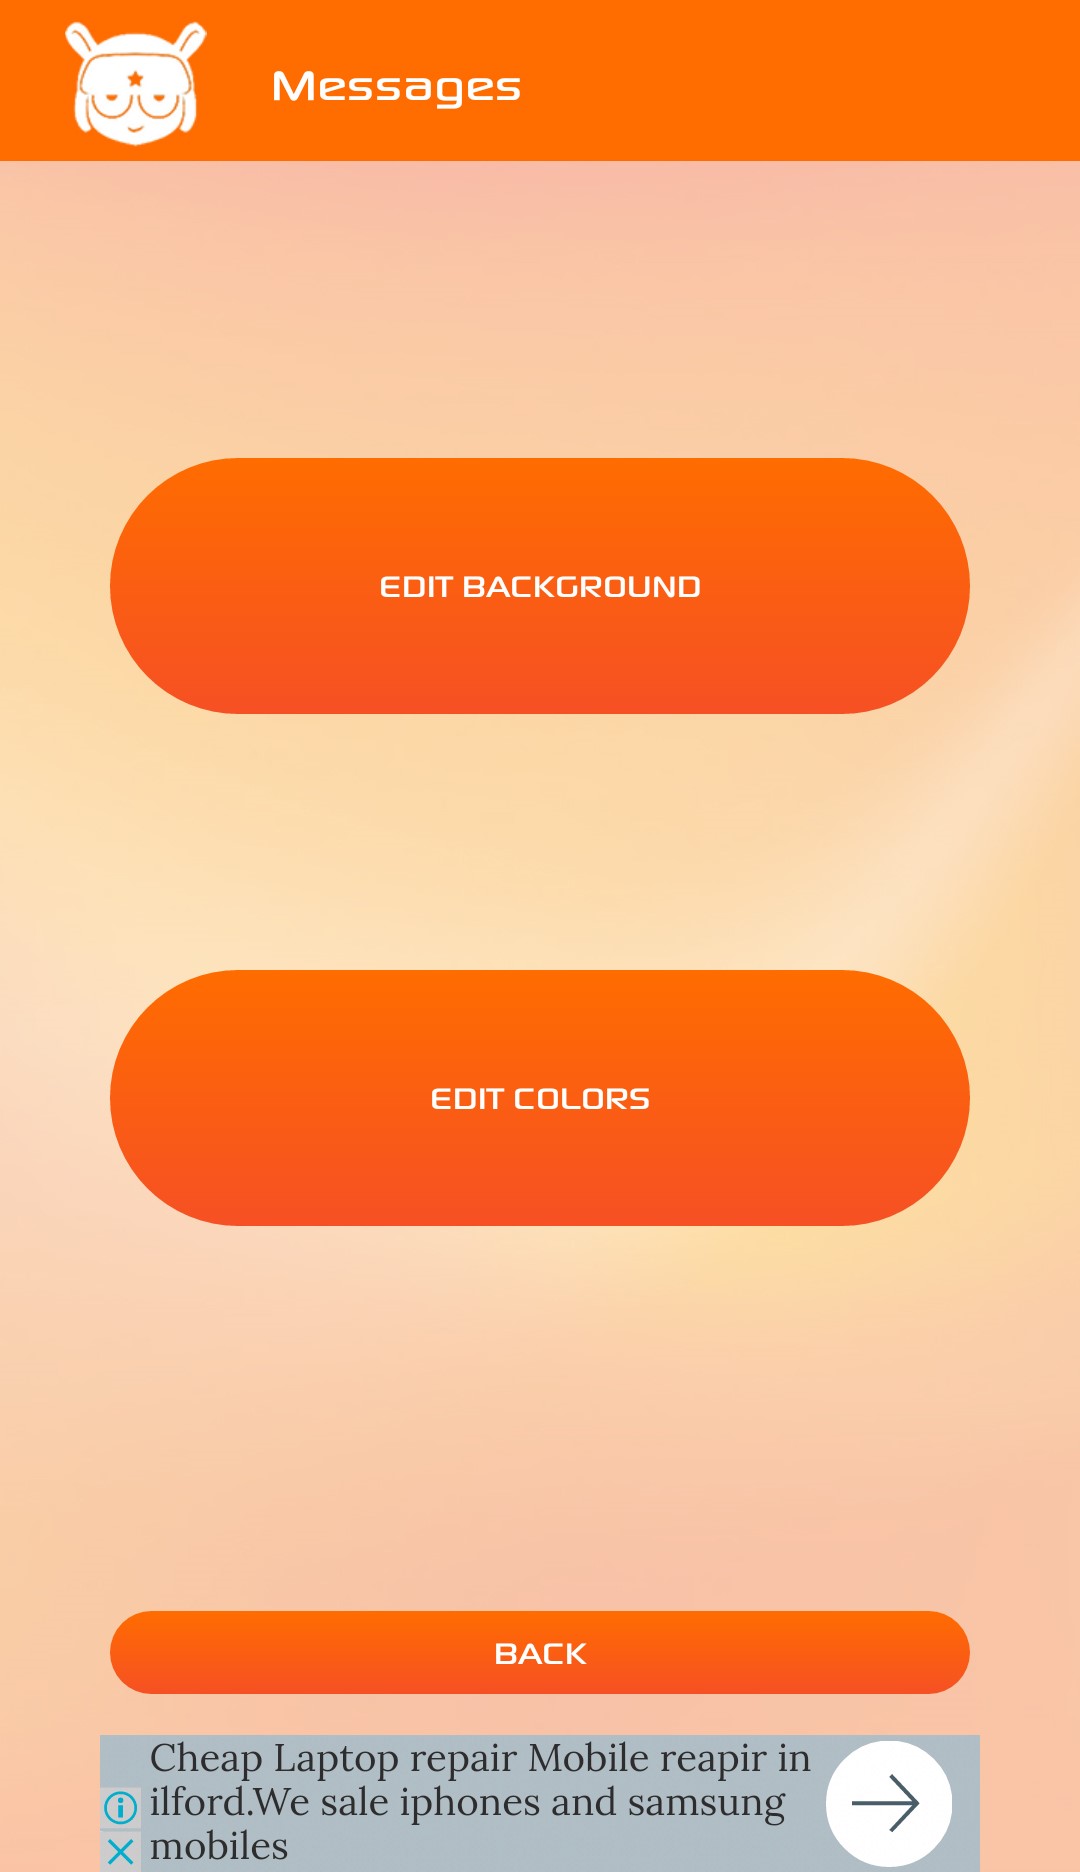
- Edit Background – In Edit Background, you can customize the background image that appears when you enter a message.
- Edit Colors – In Edit Colors, you can edit the colors and choose your own colors. If the colors are the same, it will be difficult to read.
Once you’ve edited the Theme section in Messages, you can go back and exit.
- The last step is to edit the Theme section in Settings. It’s the same as in Messages. There are 2 sections. Edit Background and Edit Colors. You can easily edit it just like in Messages. Once you’re done, you can click Back to exit.

- Once you are back on the Home Page, click Next. You can give the file a custom name and click Finish to create your own custom design theme.
- To apply a theme, go to the Themes App. Click the person icon in the top left corner. Click Themes.
- You can now use the theme you created by clicking Import at the bottom. (The theme you created for import will be found as a .mtz file in the Theme File in the MIUI Folder)
Use the MIUI Theme App to create the best and most beautiful themes using a theme you have created yourself.


Post Comment