


")


How to create a System Restore Point and perform System Restore in Windows 10?

When installing an application or upgrading a driver, errors may occur if it is not compatible with your computer. Some errors can be fixed by simply uninstalling or rolling back the driver, but some errors require a complete reinstall of the Windows operating system.
Microsoft has added System Restore to prevent you from having to reinstall your entire Windows OS due to various reasons. A System Restore Point is a kind of elixir that can restore Windows to its youthful state when it gets old. If your computer is no longer usable due to some error or if it is no longer convenient to use, it is a feature that allows you to restore the state you created at a time.
How to create a System Restore Point?
1. Press the Windows Key and type “Restore Point” in the Search Box. Click “Create a Restore Point.”

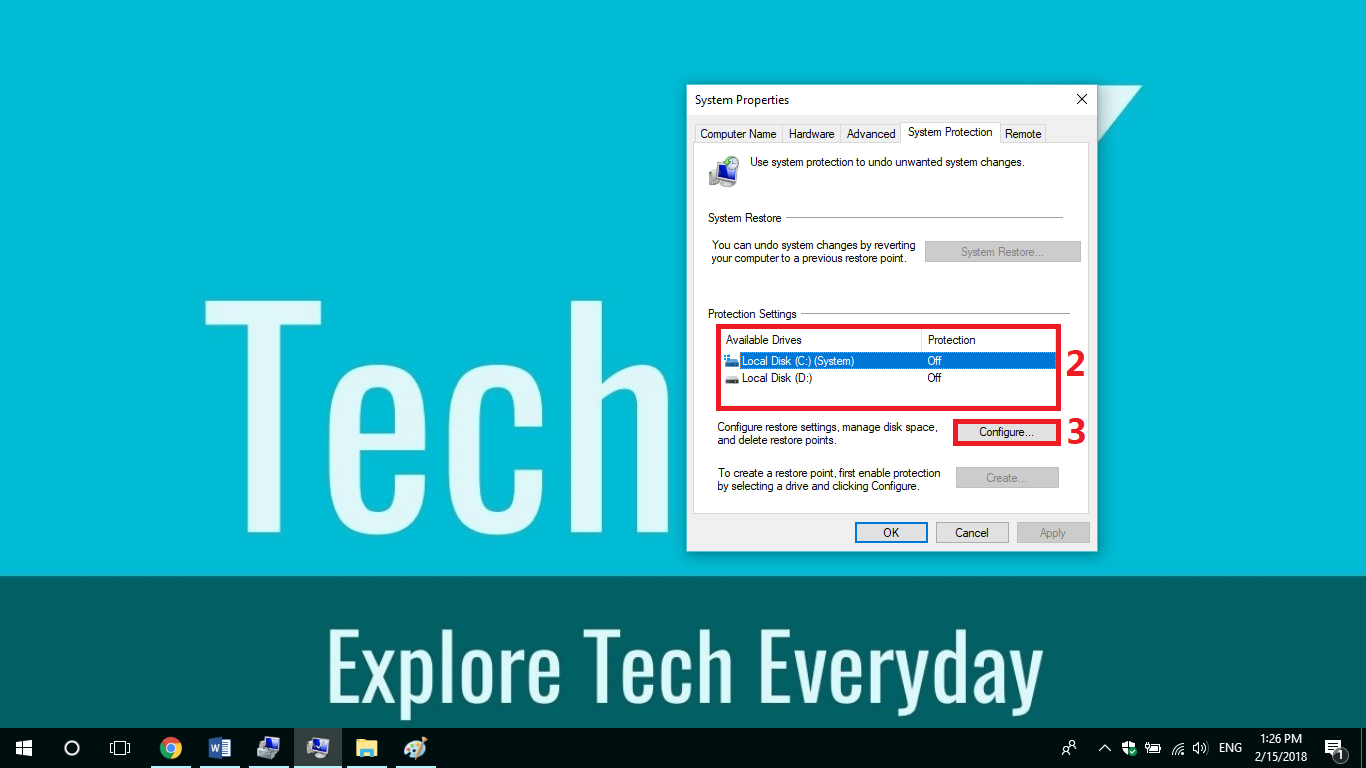
2. In “System Protection”, select the System Drive from the Available Drives under “Protection Settings” .
3. Click “Configure” .
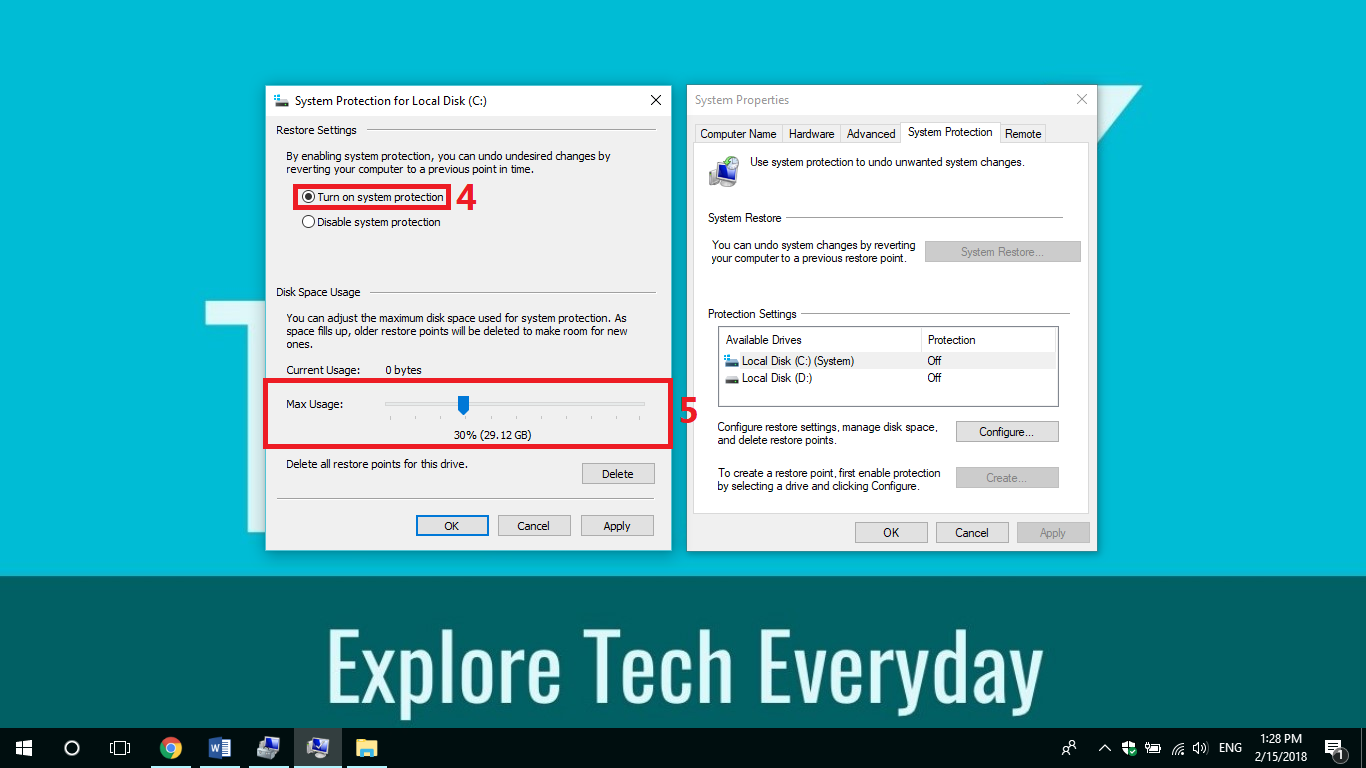
4. Check “Turn on system protection” .
5. Select the amount of disk space to use for the Restore Point in Max Usage. Click “Apply.” Then click “OK.”
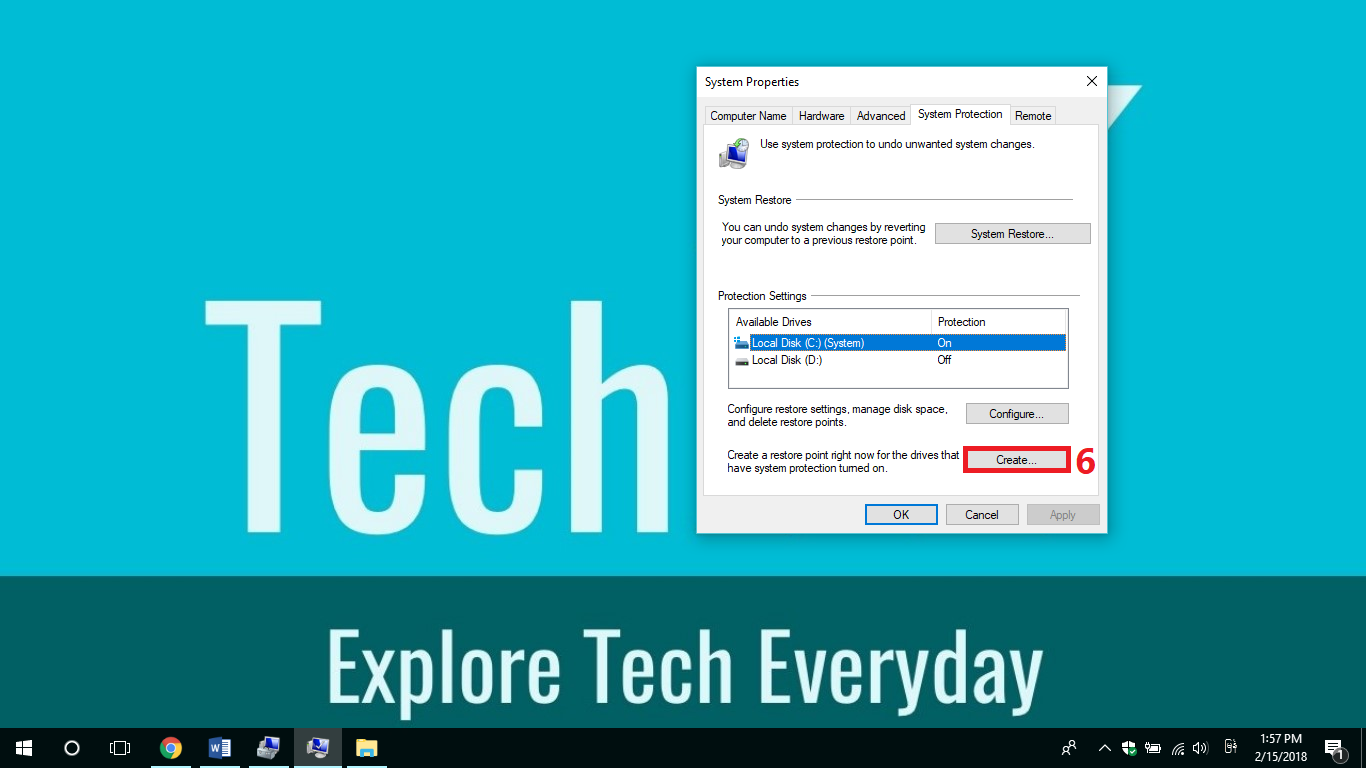
If you have completed step 5, you have completed the necessary settings for the System Restore Point.
6. Select the System Drive and click “Create” to create a System Restore Point .
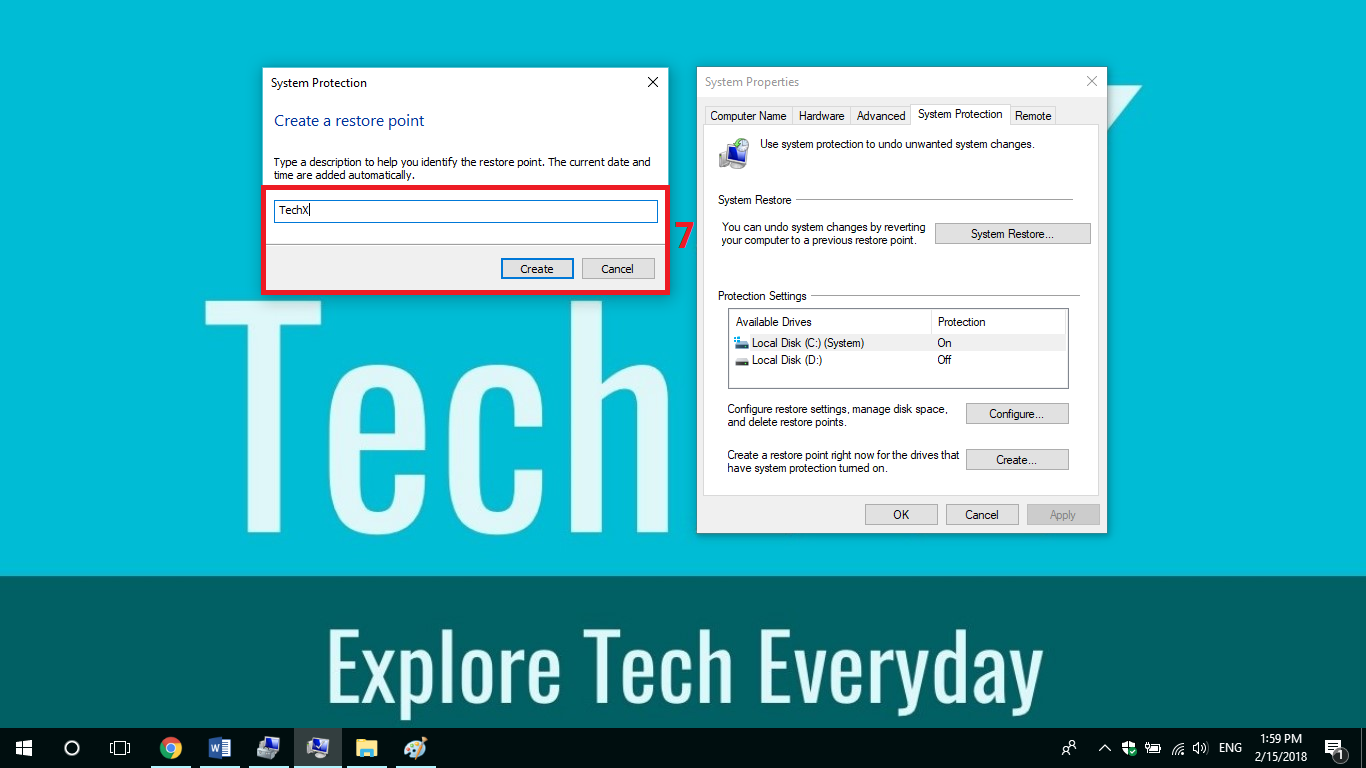
7. When the dialog box appears, enter your desired name in the text box and click “Create” .
Windows will then create a restore point. Creating a restore point may take a few minutes, depending on the system data on the system drive.
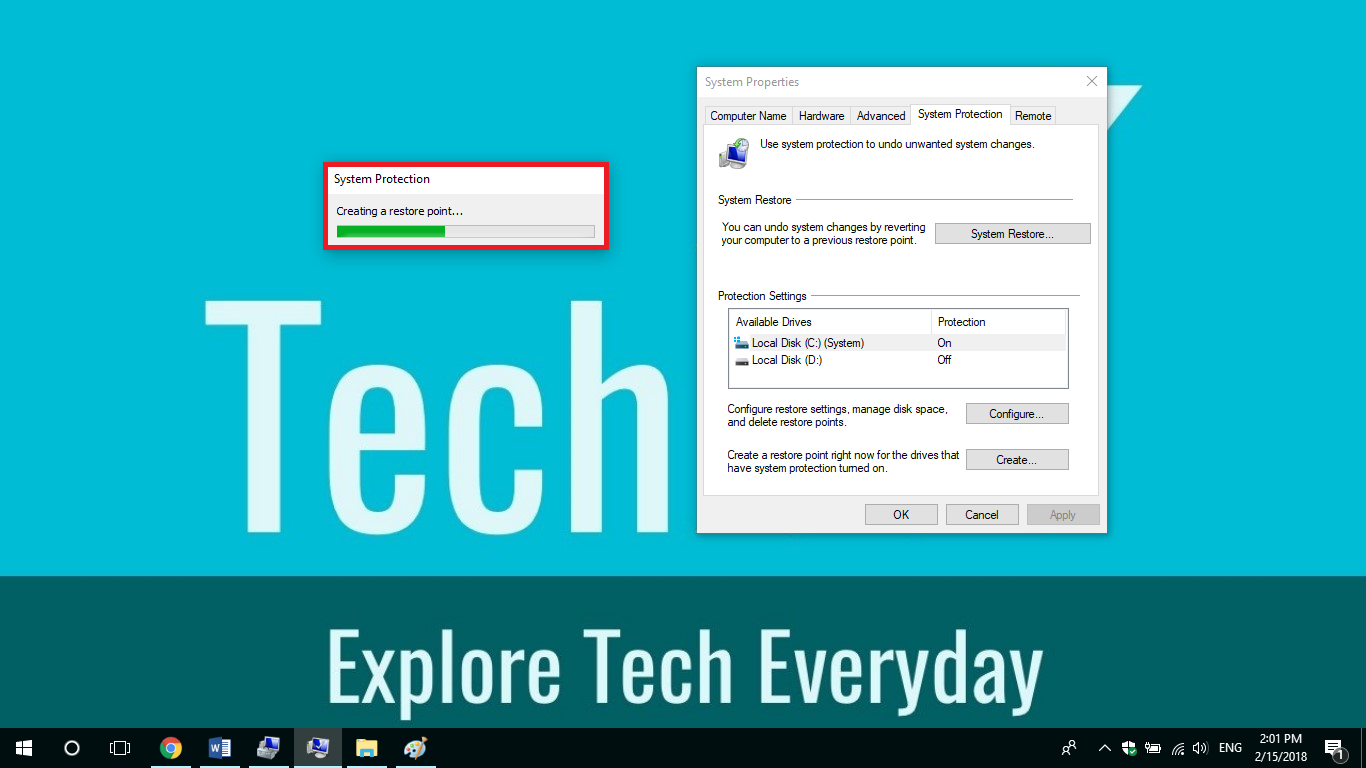
If a dialog box appears saying “The restore point was created successfully.”, a System Restore Point has been created.

Once you’ve reached step 7, Windows will save your installed program files and drivers as a restore point. Documents, photos, and personal data will not be included.
When should you create a System Restore Point?
It’s a good idea to create a System Restore Point before installing or upgrading apps or drivers from unknown sources. You should also create a System Restore Point before performing a Windows Update.
How to do System Restore?
If you are experiencing problems such as your computer not working as well as before, getting frequent errors, or becoming slow, you can go back to the past with the System Restore Point we created. (You need to disable your antivirus before performing a System Restore.)
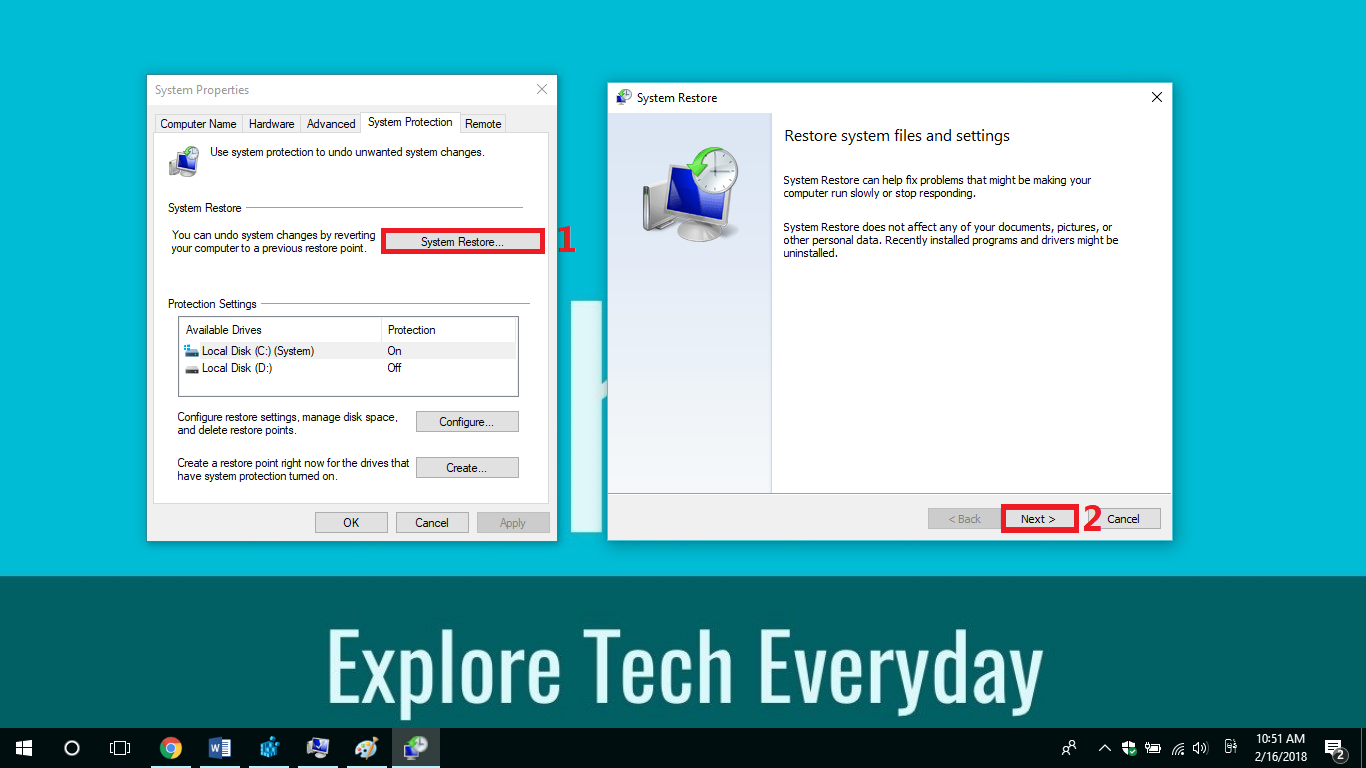
1. Click “System Restore.” A dialog box will appear saying “Restore system files and settings.”
2. Click “Next” .
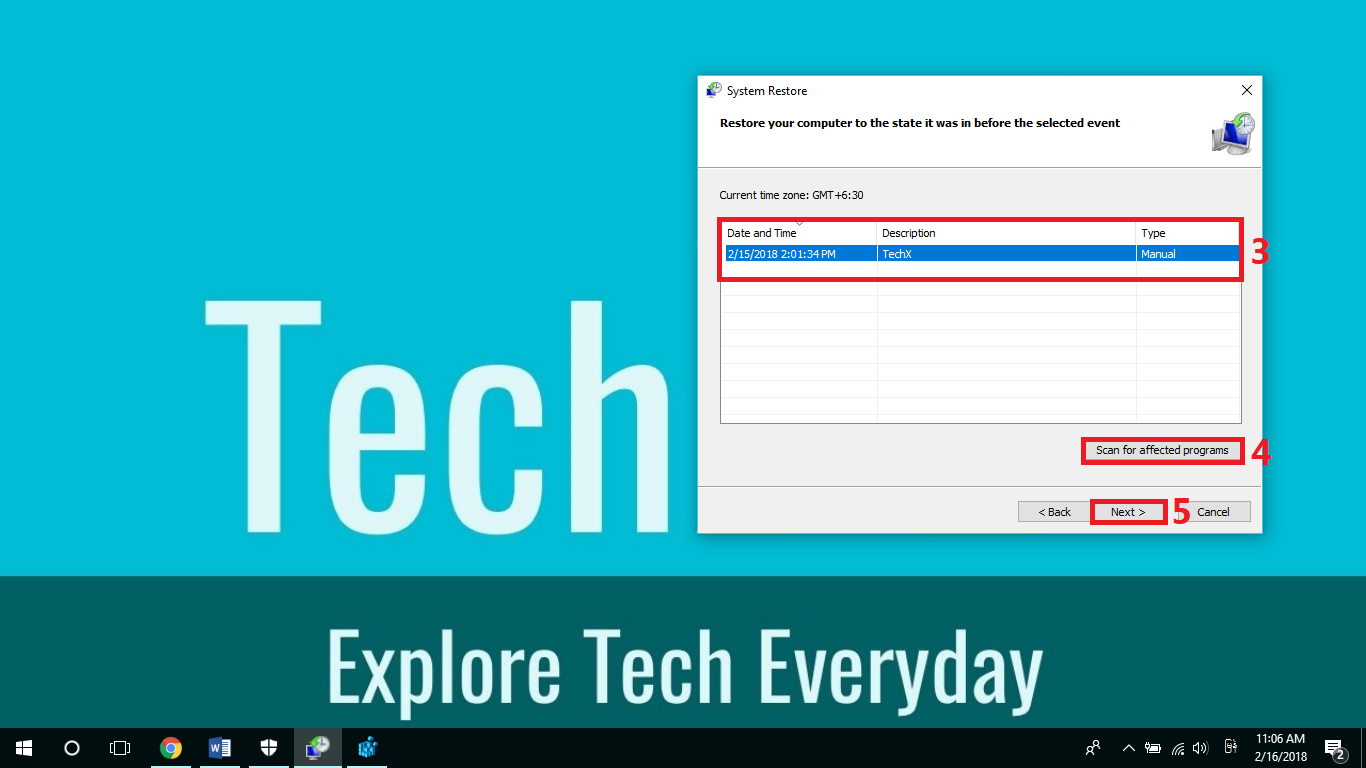
3. Select the name you gave the System Restore Point when you created it. If you have created more than one System Restore Point, you can select the one you want.
4. Click “Scan for affected programs” . A dialog box will appear that the scan is in progress. This may take a few minutes depending on the Restore Point. When it is finished, click Closed.
5. Click “Next” to continue.
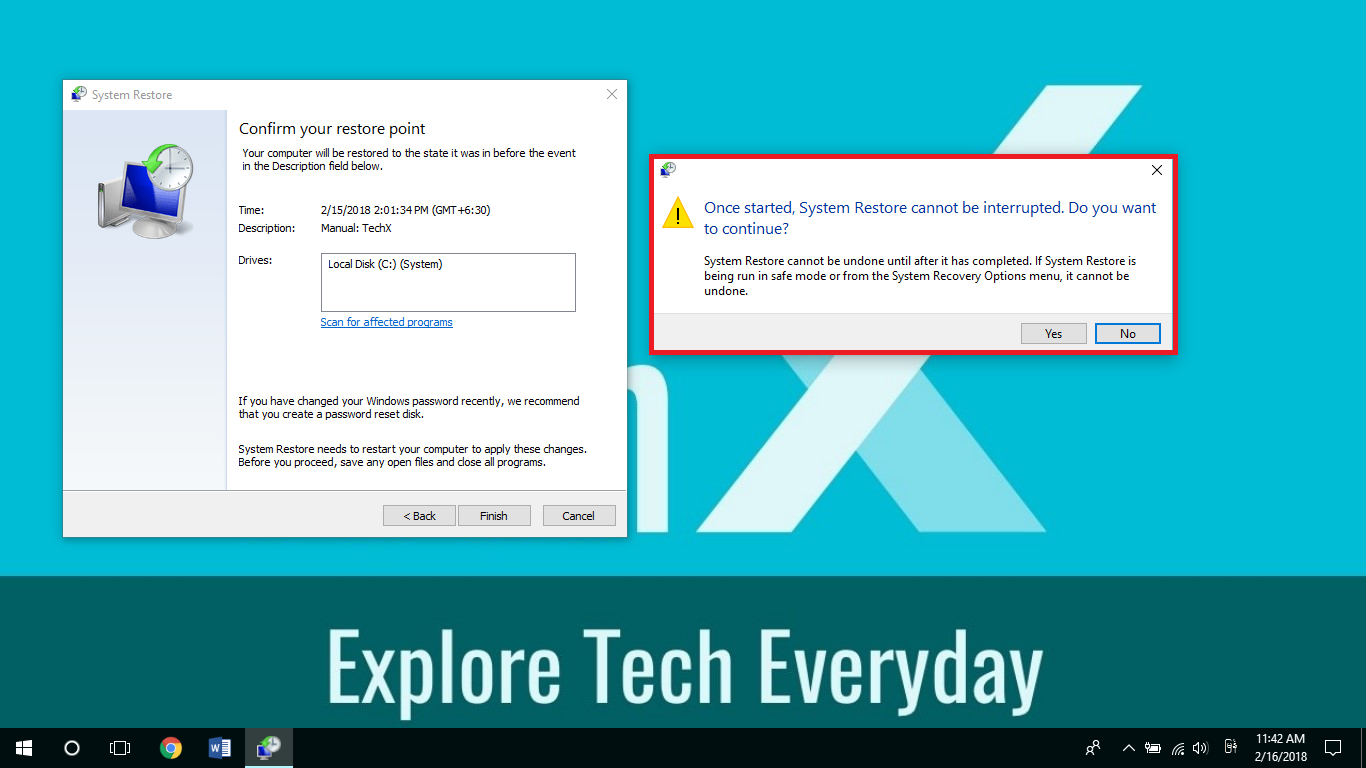
6. Click “Finish” . This step is important. Because you will be going back to a previous point in time when you created a System Restore Point, any apps and drivers you installed later will be lost. In my case, I will go back to 2/15/2018 2:01:34 PM (GMT +6:30). Any apps and drivers you installed after the 15th will be lost if you perform a System Restore.
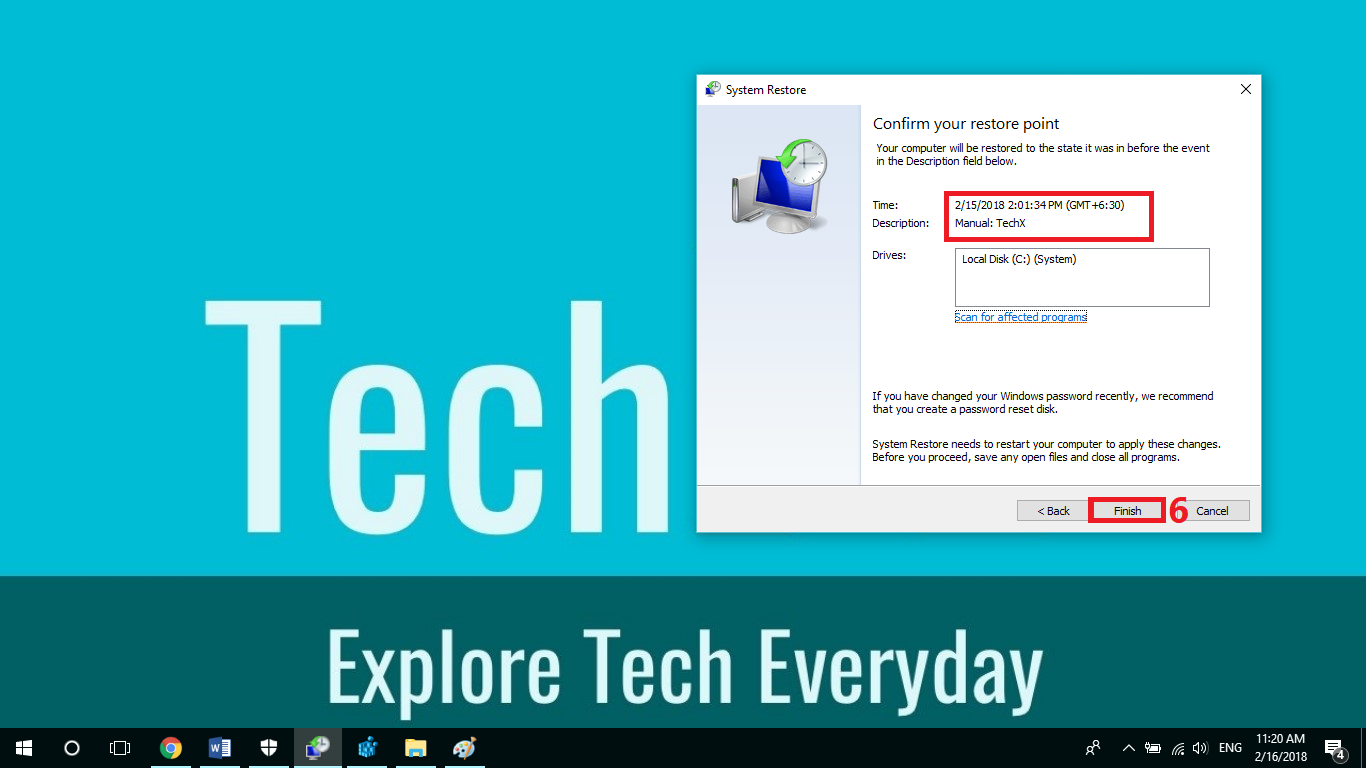
7. When the dialog box appears, select “Yes” .
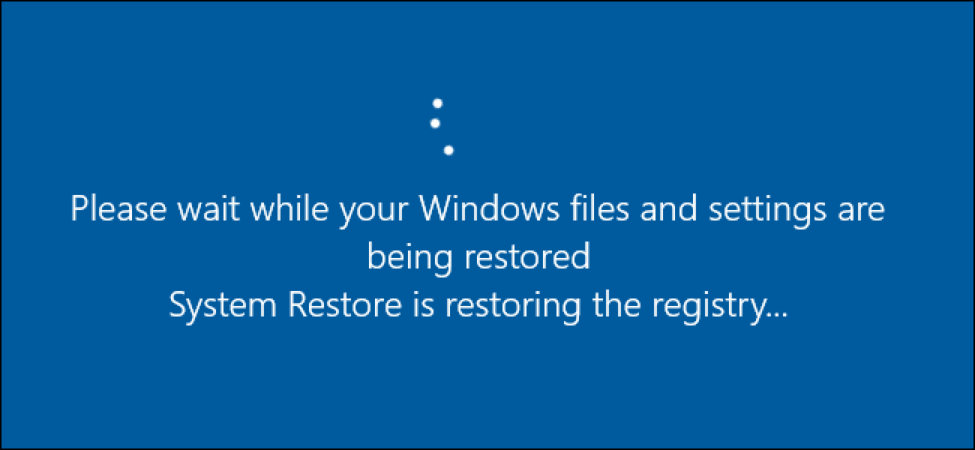
After clicking “Yes” , the System Restore dialog box will appear. After a few minutes, Windows will automatically restart, so you need to close any open programs. The restore process can take 15 to 30 minutes.
If Windows restarts and a dialog box appears saying “System Restore completed successfully.”, then System Restore was successful.

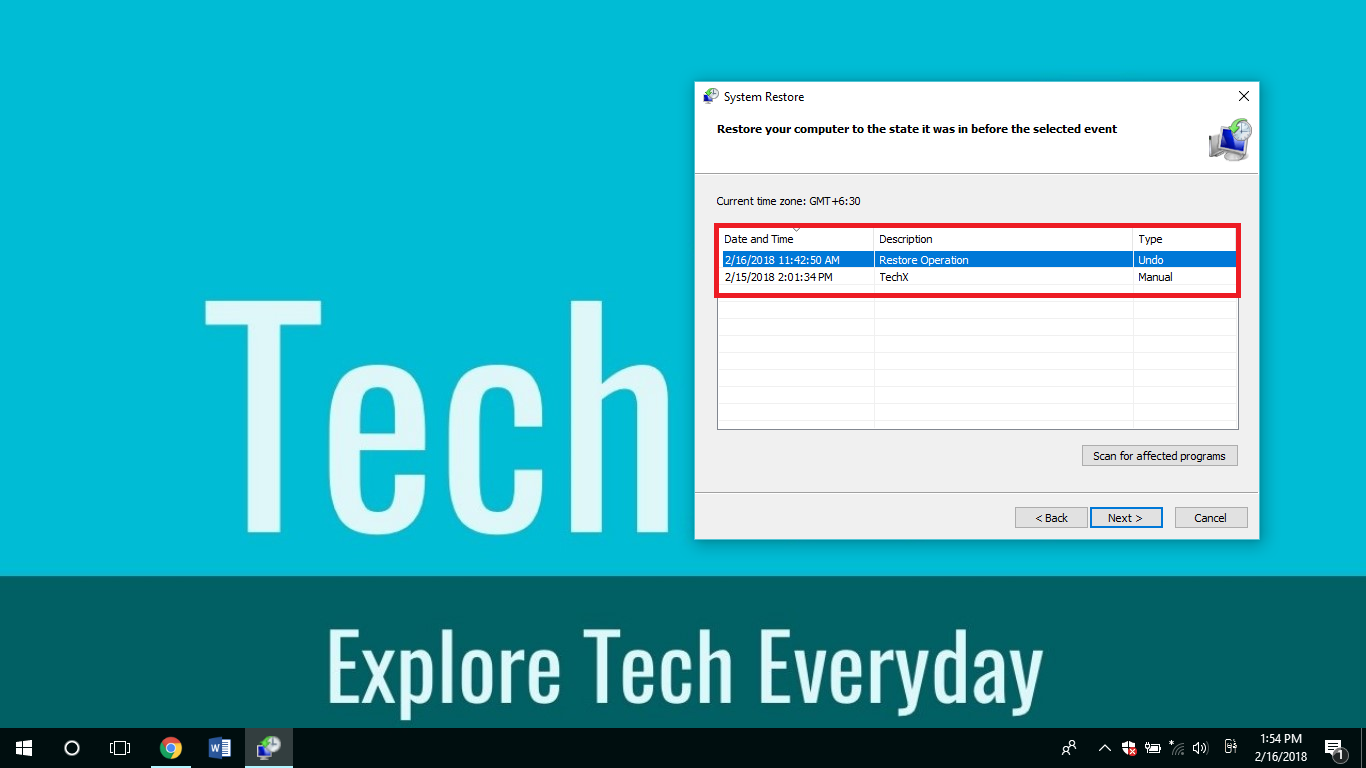
If your computer does not perform a System Restore and nothing happens, you can cancel it by clicking “Undo System Restore” .


Post Comment