


")


How to build a kernel for an Android device

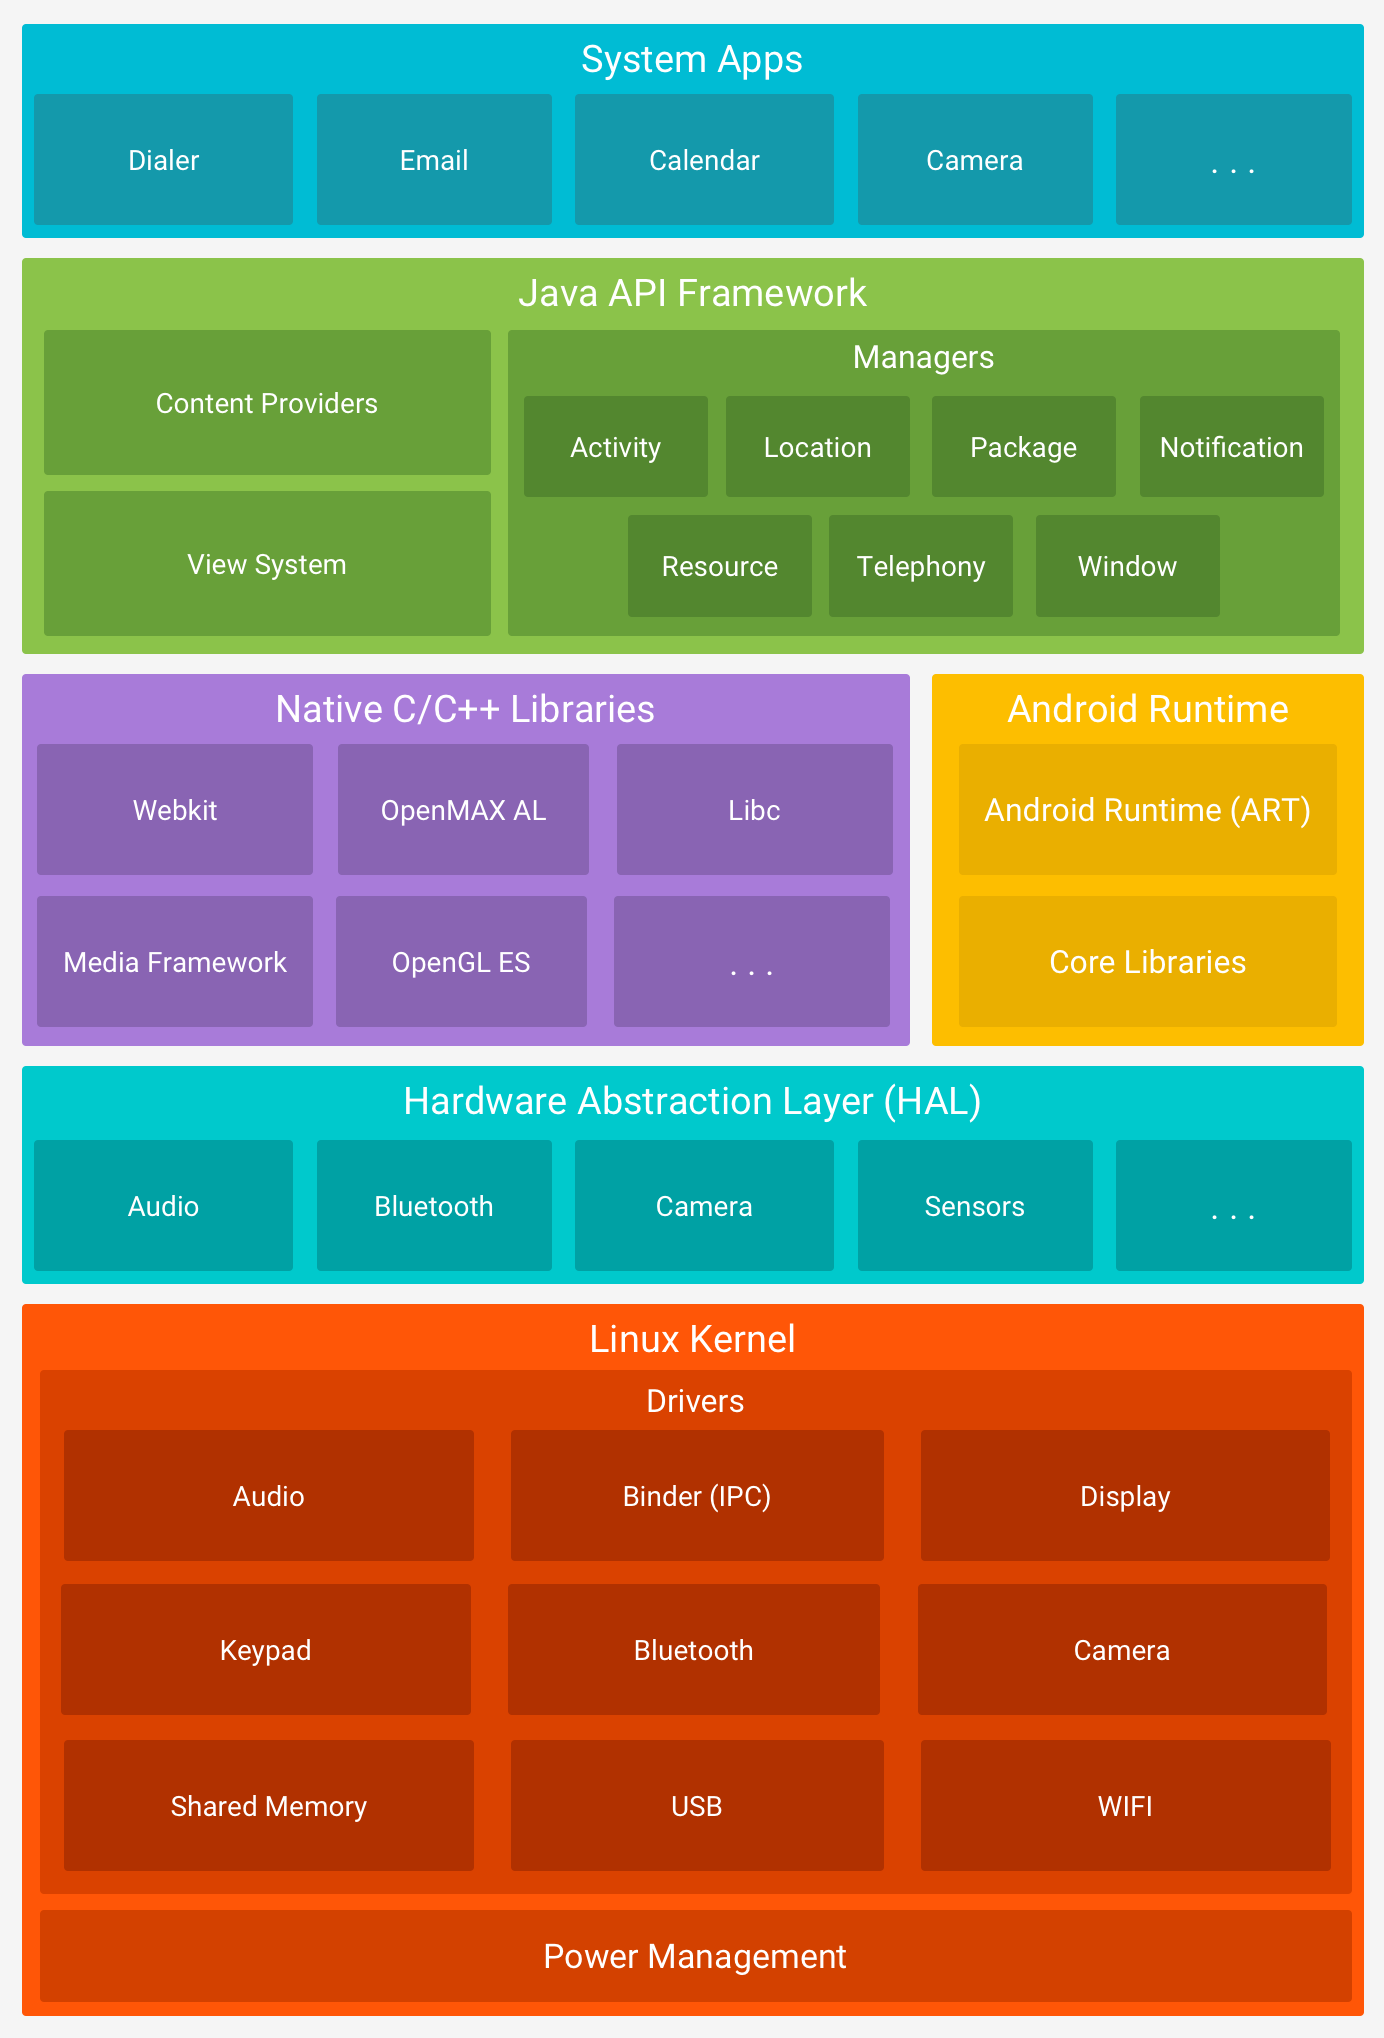
First, as an introduction, I will explain what a kernel is and what it is for. Android OS is based on the Linux Kernel, and Android’s Kernel is a modified Linux Kernel. The Linux Kernel branches used in Android are Long Term Support (LTS) branches. You can view Long Term Branches at https://www.kernel.org . For example, the Nexus 5X, 6, and 6P use the branch linux-3.10-y.
Android OS is based on Linux Kernel, and Kernel is an important part of an OS. Kernel is an important part where hardware components such as CPU, Memory, Display and Software work together. The Linux Kernel part of Android OS Architecture includes Display Driver, Camera Driver, USB Driver, Bluetooth Driver, Audio Driver, Power Management, etc. (I am just giving examples, there are more.) For example, the stock kernel that comes with my Nexus 5X does not have Double Tap to Wake/Sleep, KCAL Color Control for Display, and Sound Control for Audio. If you have the skills, you can add these Kernel features from a Kernel source and recompile them. This means that these are the features that the Kernel part can do. Why compile a custom Kernel is because you want these Kernel features.
Requirements
- A computer running Linux OS (I use Ubuntu)
- You should know some basic Linux commands.
- A Kernel Source Required for Your Phone
- Toolchains required to compile the kernel (i.e. an ARM/ARM64 GCC Compiler)
- It would be better if you know how to use Git, as you will need it later when adding Kernel features.
Kernel Sources
The download sites for the kernel sources will vary depending on the phone model. The necessary links are provided below.
- Google Nexus/Pixel ( Qualcomm Chipset Only) : https://android.googlesource.com/kernel/msm
- Google Nexus (For all Chipsets) : https://android.googlesource.com/kernel/
- Sony Xperia: https://developer.sonymobile.com/downloads/xperia-open-source-archives/
- LG : http://opensource.lge.com/index
- Samsung : http://opensource.samsung.com/reception.do
- HTC : https://www.htcdev.com/devcenter/downloads
- Xiaomi : https://github.com/MiCode
- OnePlus : https://github.com/OnePlusOSS
- Motorola : https://github.com/MotorolaMobilityLLC
- Another place where you can get Kernel sources for various Android devices in one place is the LineageOS ROM Community. But there is one thing: a Kernel built from LineageOS Source will only work on its ROM and AOSP based ROMs. (For example, in the case of Xiaomi devices, you cannot use a Kernel built from LineageOS source on its StockROM (MIUI), it will not work. The phone must have LineageOS installed.
- https://github.com/LineageOS
Toolchains
To compile from kernel source, you need a toolchain. There are two (2) types of toolchains, ARM and ARM64, depending on the CPU architecture of your phone. The necessary links are provided below.
- arm : https://android.googlesource.com/platform/prebuilts/gcc/linux-x86/arm/arm-eabi-4.8/
- arm64 : https://android.googlesource.com/platform/prebuilts/gcc/linux-x86/aarch64/aarch64-linux-android-4.9/
Downloading
I will be using my Nexus 5X as an example for this tutorial. The concept is the same for other phones, the only difference is where to download the Kernel Source.
First open Terminal and type this command. (It will create a dir)
mkdir KernelName
cd KernelName
- To download the Kernel source for Nexus 5X, type this command.
- First, you need to install Git on your computer.
git clone -b android-msm-bullhead-3.10-oreo-r4 –depth=1 https://android.googlesource.com/kernel/msm
- Then you need to download Toolchains to compile Kernel. (One thing to note here is that if your phone’s CPU arch is arm64, download arm64 toolchain, if not arm, download arm toolchain)
git clone https://android.googlesource.com/platform/prebuilts/gcc/linux-x86/aarch64/aarch64-linux-android-4.9
- Once you have completed all of this, you are ready to build the Kernel.
How To Build Kernel
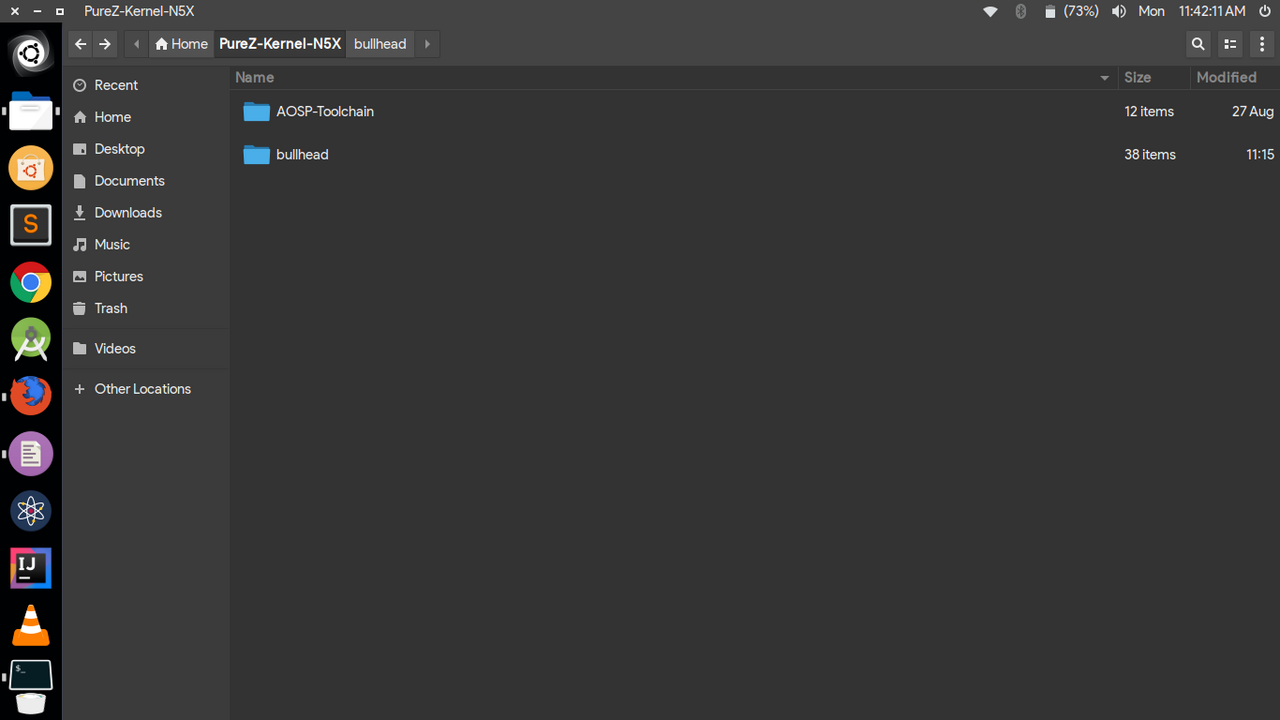
- First, both the Kernel source and the toolchains must be ready in the KernelName (PuerZ-Kernel-N5X) Dir where you first built it.
- I will name the Toolchain Name as AOSP-Toolchain and the Nexus 5X Kernel Source Name as bullhead. (Rename it as you like, no problem, just make sure to know the exact names where the Toolchain Location is returned)
- e.g : Toolchain location
/home/search/PureZ-Kernel-N5X/AOSP-Toolchain
- e.g : Kernel Source location
/home/search/PureZ-Kernel-N5X/bullhead
- Then go to the Kernel source folder that you downloaded for your phone.
- Right click and open Terminal.
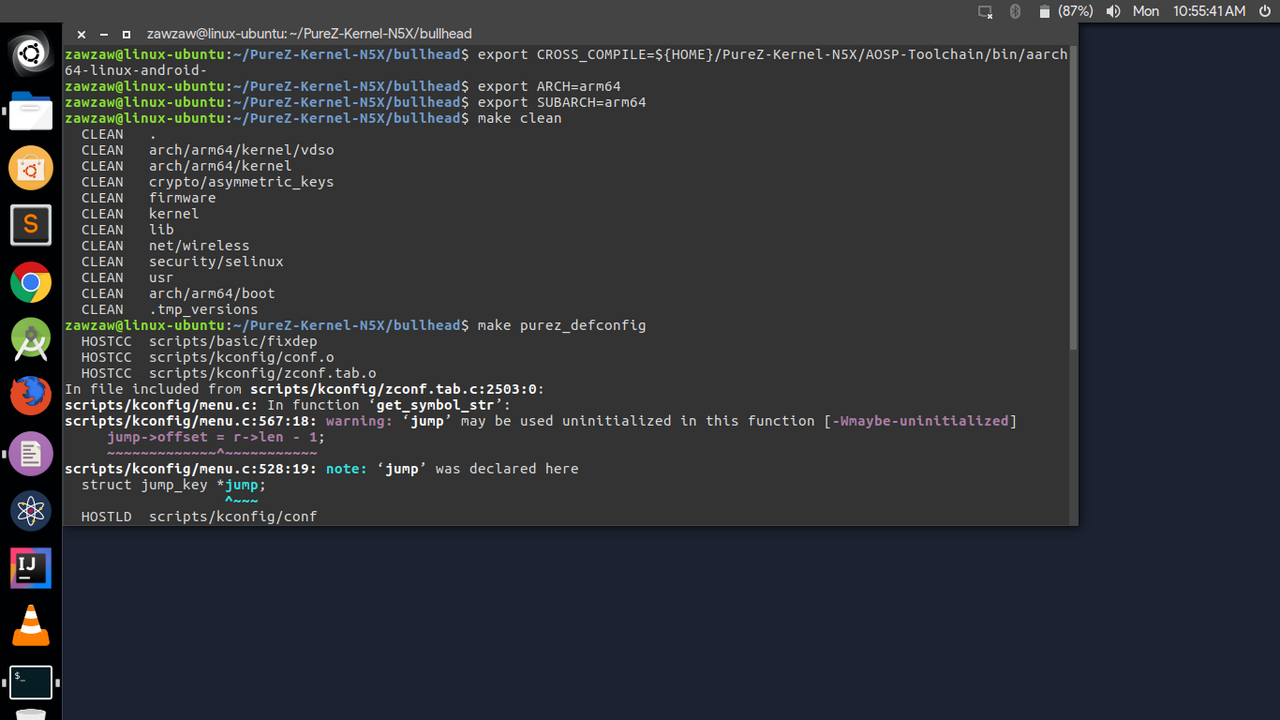
- The first thing you need to do is to compile the Kernel from source and use the export command to set a new environment variable in the toolchain. (export – Set a New Environment Variable)
- Type this command (where the part after bin/ is called the toochain prefix. Now I will tell you the prefixes of the Toochains provided by Google, for ARM it is “arm-eabi-” and for ARM64 it is “aarch64-linux-android-“)
export CROSS_COMPILE=${HOME}/PureZ-Kernel-N5X/AOSP-Toolchain/bin/aarch64-linux-android-
- First, you need to know whether your phone’s CPU arch is arm or arm64.
- First, you need to tell me the arch of your phone.
- Since the Nexus 5X is arm64, continue typing this command. (If your phone is arm, replace arm64 with arm.)
export ARCH=arm64
export SUBARCH=arm64
- Next, if there are compiled output files in the kernel source, you need to clear them.
make clean
- Another thing to know is the build kernel configuration of the Kernel you are building.
- For ARM devices, it is located under kernelsource/arch/arm/configs/.
- For ARM64 devices, it is located under kernelsource/arch/arm64/configs/.
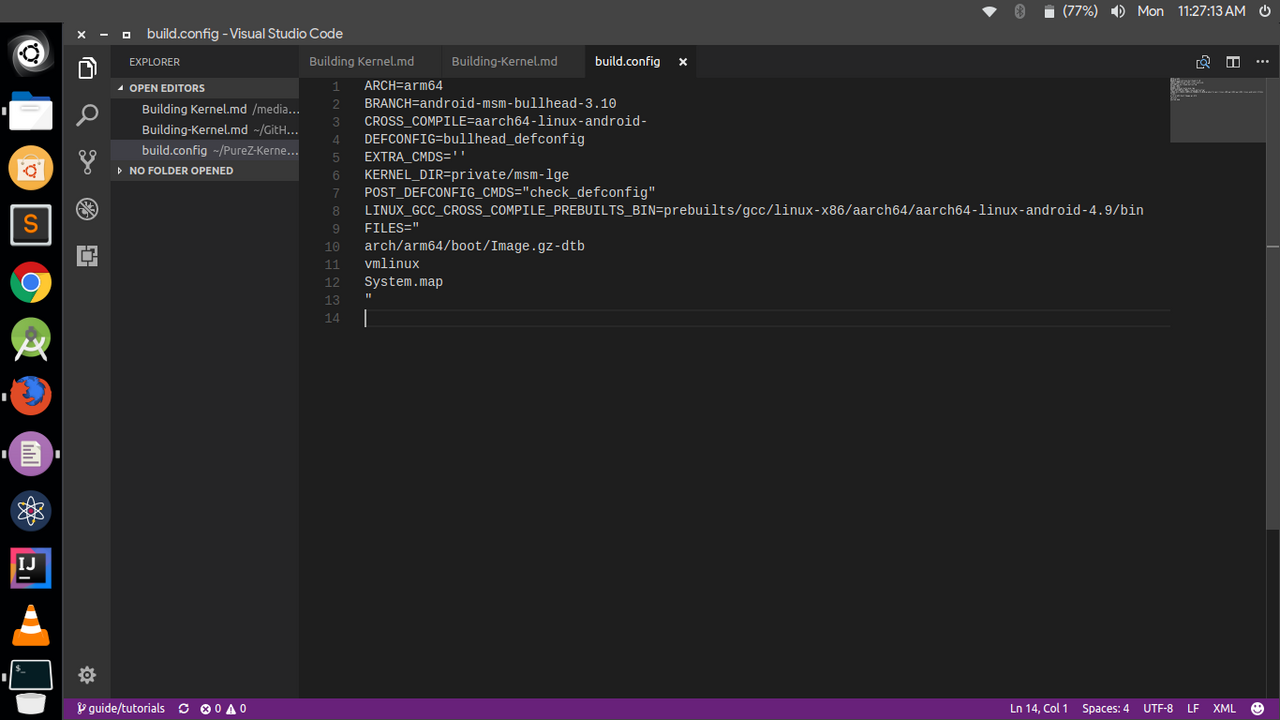
- For Nexus 5X, bullhead/arch/arm64/configs/bullhead_defconfig (bullhead_defconfig is the kernel configuration section that will be built for Nexus 5X)
- If you want to know the kernel defconfig for your phone, you can open the KernelSource/build.config file.
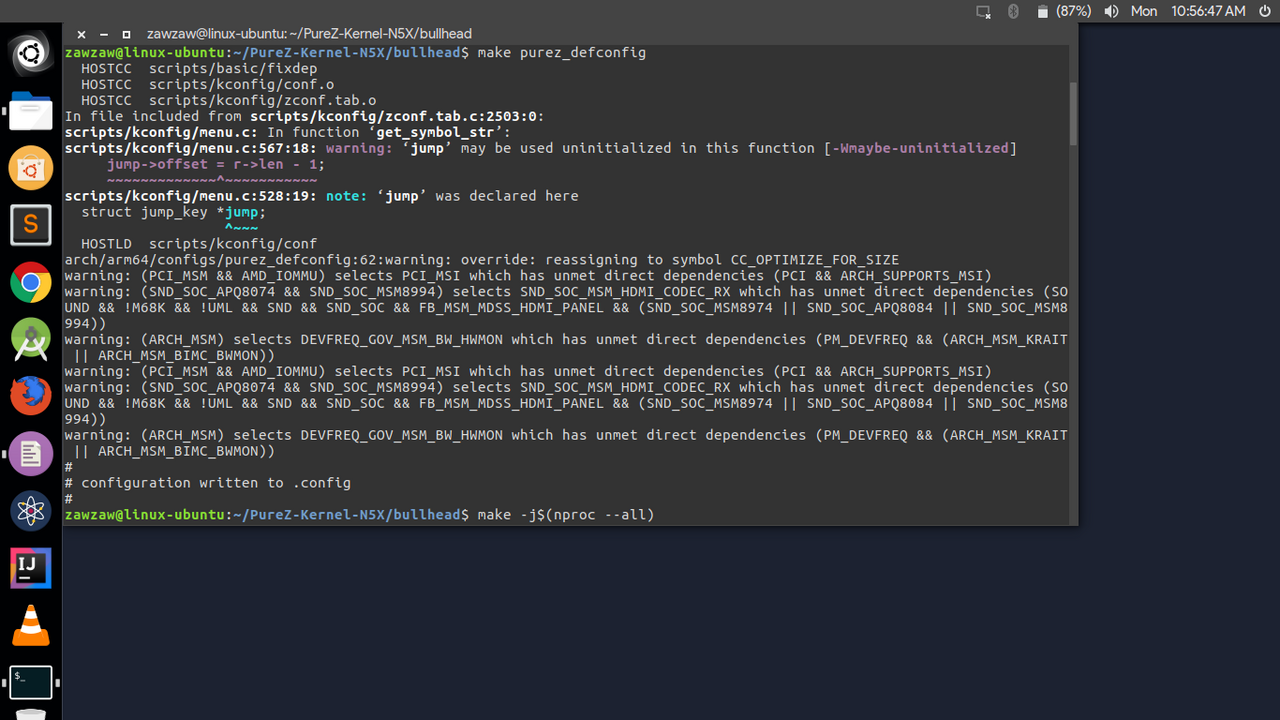
- First, you need to configure the build configuration before compiling the kernel.
make bullhead_defconfig
- Now we will compile the Kernel, type the command below to compile it.
make -j$(nproc –all)
- Compilation processing time may vary depending on your computer’s CPU core.
- Once that’s done, the compiler will compile it.
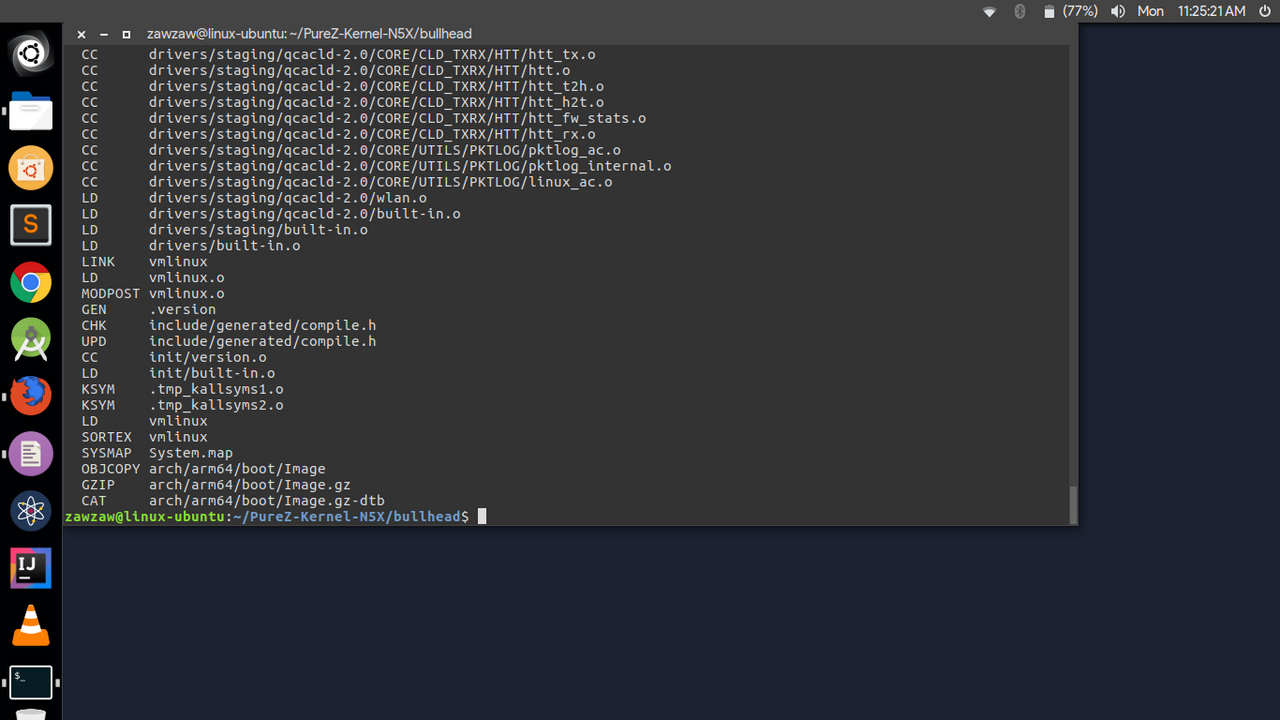
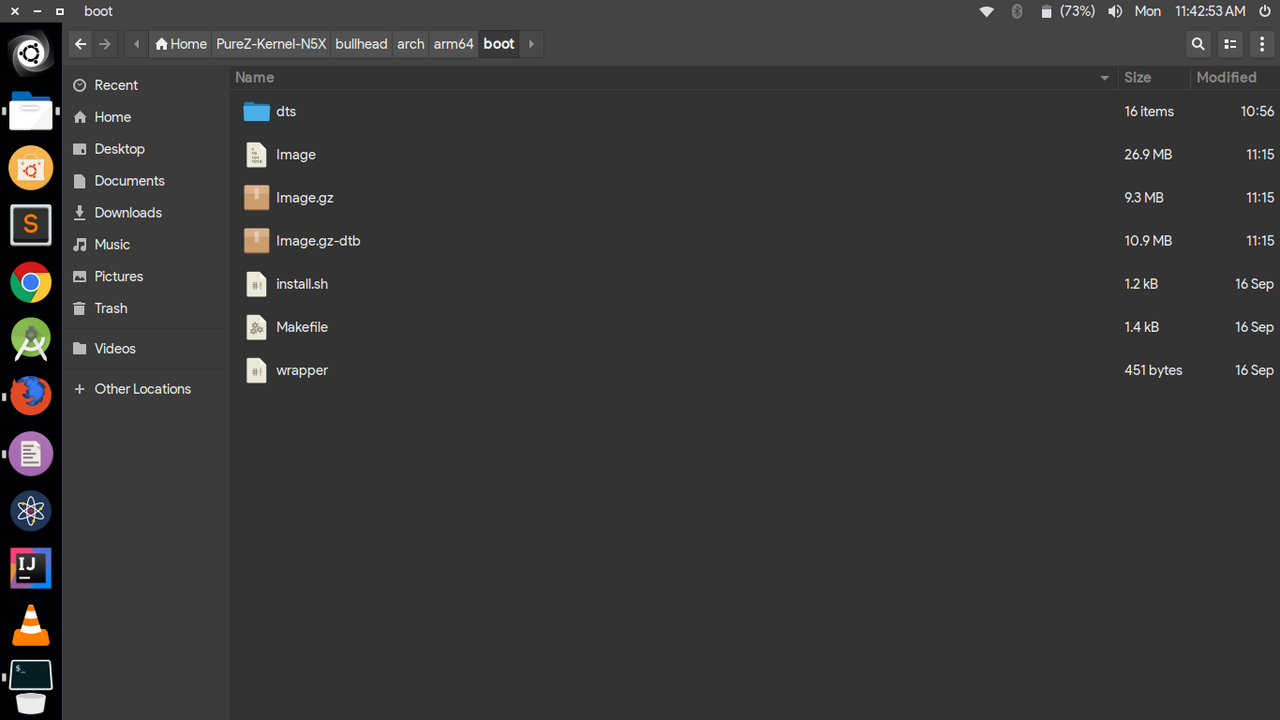
- The built Kernel zImages will be released under – kernelsource/arch/arm/boot/ for ARM, and under – kernelsource/arch/arm64/boot/ for ARM64.
- If that’s successful, I’ll continue writing about how to use FlashableZip to install the Kernel for your phone.
How To Create FlashableZip
- Once the Kernel Build is complete and the zImage is generated, I will show you how to Create a FlashableZip that you can install from CustomRecovery (TWRP) for your phone. There is a template called AnyKernel2 – Kernel FlashableZip written by osm0sis, an XDA Recognized Developer. I will continue to explain what you need to prepare for your phone using this template.
- Take a look at the AnyKernel2 Documentation, it’s easy: https://github.com/osm0sis/AnyKernel2/blob/master/README.md
- First, download AnyKernel2.
git clone https://github.com/osm0sis/AnyKernel2
OR
- Recommended for Nexus 5X
git clone -b bullhead –depth=1 https://github.com/zawzaww/anykernel2-flashable
- What is needed is to edit the Kernel name, know the device name (eg: LG Nexus 5X device name – bullhead), know the boot partition location of your phone, and if it is in ramdisk, you need your phone’s fstab.devicename (eg- fstab.bullhead), fstab stands for File Systems Table.
- Here is an example fstab.bullhead for Nexus 5X: https://github.com/purezandroid/device-lge-bullhead/blob/purez-8.0.0/fstab.bullhead (you will need the same for your phone as device-tree/fstab.your-devicename )
- First, copy the Image.gz-dtb (kernelsource/arch/arm64/boot/Image-gz-dtb) that you got from Compile and paste it into the AnyKernel2 Folder, then rename it to zImage-dtb.
- I’ll continue to talk about the things that need to be fixed.
- Kernel Name: Open the anykernel2.sh file in AnyKernel2 with a text editor and write kernel.string= kernel name.
kernel.string=PureZ Kernel by ZawZaw @XDA-Developers
Device Name: Open anykernel2.sh and replace device.name1 and device.name2 with your phone’s device name. (The name will vary depending on the phone model.)
device.name1=bullhead
device.name2=Bullhead
- Boot partition: This is important. You need to know the exact location of the boot partition for your phone. You can find out how to do this if your phone is rooted. You need to edit the line “block=/dev/block/platform/…” in anykernel2.sh.
- For Nexus 5X
block=/dev/block/platform/soc.0/f9824900.sdhci/by-name/boot;

- fstab.device-name : There is a folder called ramdisk in AnyKernel2, inside which we will add the fstab.bullhead file for Nexus 5X as mentioned above. (The main contents of this fstab file are the <mount_point> partitions of your phone such as /system, /data, /cache, /firmware, /boot, /recovery, /persist. These mount_points are just filesystem paths. It is an Android Filesystems Table of your phone.
- I will briefly describe its format. (This is the format for Android 4.3 and later versions)
- If you want to learn more, you can read the full story on the AOSP site .
<src> <mount_point> <type> <mount_flags> <fs_mgr_flags>
- E.g for Nexus 5X ( /system )
/dev/block/platform/soc.0/f9824900.sdhci/by-name/system /system ext4 ro,barrier=1,inode_readahead_blks=8
- For Nexus 5X (fstab.bullhead) Sample : https://android.googlesource.com/device/lge/bullhead/+/oreo-r6-release/fstab.bullhead
# Android fstab file. #<src> <mnt_point> <type> <mnt_flags and options> <fs_mgr_flags> # The filesystem that contains the filesystem checker binary (typically /system) cannot # specify MF_CHECK, and must come before any filesystems that do specify MF_CHECK /dev/block/platform/soc.0/f9824900.sdhci/by-name/system /system ext4 ro,barrier=1,inode_readahead_blks=8 wait,verify=/dev/block/platform/soc.0/f9824900.sdhci/by-name/metadata /dev/block/platform/soc.0/f9824900.sdhci/by-name/vendor /vendor ext4 ro,barrier=1,inode_readahead_blks=8 wait,verify=/dev/block/platform/soc.0/f9824900.sdhci/by-name/metadata /dev/block/platform/soc.0/f9824900.sdhci/by-name/userdata /data ext4 noatime,nosuid,nodev,barrier=1,data=ordered,nomblk_io_submit,noauto_da_alloc,errors=panic,inode_readahead_blks=8 wait,check,forcefdeorfbe=/dev/block/platform/soc.0/f9824900.sdhci/by-name/metadata /dev/block/platform/soc.0/f9824900.sdhci/by-name/cache /cache ext4 noatime,nosuid,nodev,barrier=1,data=ordered,nomblk_io_submit,noauto_da_alloc,errors=panic wait,check /dev/block/platform/soc.0/f9824900.sdhci/by-name/persist /persist ext4 noatime,nosuid,nodev,barrier=1,data=ordered,nodelalloc,nomblk_io_submit,errors=panic wait,notrim /dev/block/platform/soc.0/f9824900.sdhci/by-name/modem /firmware vfat ro,shortname=lower,uid=1000,gid=1000,dmask=227,fmask=337,context=u:object_r:firmware_file:s0 wait /dev/block/platform/soc.0/f9824900.sdhci/by-name/boot /boot emmc defaults defaults /dev/block/platform/soc.0/f9824900.sdhci/by-name/recovery /recovery emmc defaults defaults /dev/block/platform/soc.0/f9824900.sdhci/by-name/misc /misc emmc defaults defaults /dev/block/platform/soc.0/f9824900.sdhci/by-name/modem /radio emmc defaults defaults /dev/block/platform/soc.0/f9824900.sdhci/by-name/sbl1 /sbl1 emmc defaults defaults /dev/block/platform/soc.0/f9824900.sdhci/by-name/tz /tz emmc defaults defaults /dev/block/platform/soc.0/f9824900.sdhci/by-name/rpm /rpm emmc defaults defaults /dev/block/platform/soc.0/f9824900.sdhci/by-name/sdi /sdi emmc defaults defaults /dev/block/platform/soc.0/f9824900.sdhci/by-name/aboot /aboot emmc defaults defaults /dev/block/platform/soc.0/f9824900.sdhci/by-name/imgdata /imgdata emmc defaults defaults /dev/block/platform/soc.0/f9824900.sdhci/by-name/pmic /pmic emmc defaults defaults /dev/block/platform/soc.0/f9824900.sdhci/by-name/hyp /hyp emmc defaults defaults /dev/block/platform/soc.0/f9824900.sdhci/by-name/sec /sec emmc defaults defaults /dev/block/platform/soc.0/f9824900.sdhci/by-name/keymaster /keymaster emmc defaults defaults /dev/block/platform/soc.0/f9824900.sdhci/by-name/cmnlib /cmnlib emmc defaults defaults /dev/block/platform/soc.0/f9824900.sdhci/by-name/persistent /persistent emmc defaults defaults /devices/soc.0/f9200000.ssusb/f9200000.dwc3/xhci-hcd.0.auto/usb* auto auto defaults voldmanaged=usb:auto /dev/block/zram0 none swap defaults zramsize=533413200,notrim /dev/block/platform/soc.0/f9824900.sdhci/by-name/sbl1bak /sbl1bak emmc defaults defaults /dev/block/platform/soc.0/f9824900.sdhci/by-name/tzbak /tzbak emmc defaults defaults /dev/block/platform/soc.0/f9824900.sdhci/by-name/rpmbak /rpmbak emmc defaults defaults /dev/block/platform/soc.0/f9824900.sdhci/by-name/abootbak /abootbak emmc defaults defaults /dev/block/platform/soc.0/f9824900.sdhci/by-name/pmicbak /pmicbak emmc defaults defaults /dev/block/platform/soc.0/f9824900.sdhci/by-name/hypbak /hypbak emmc defaults defaults /dev/block/platform/soc.0/f9824900.sdhci/by-name/keymasterbak /keymasterbak emmc defaults defaults /dev/block/platform/soc.0/f9824900.sdhci/by-name/cmnlibbak /cmnlibbak emmc defaults - If all of this is successful, we will create a Flashable Zip.
- Right-click on the AnyKernel2 folder and open Terminal.
- Type this command
zip -r9 Your-Kernel-Name.zip * -x README Your-Kernel-Name.zip
- Once done, a Kernel Flashable Zip will appear in the Kernel2 folder.
- Reday to flash your Kernel Zip from TWRP Recovery for your Android Device
- Done


Post Comment